
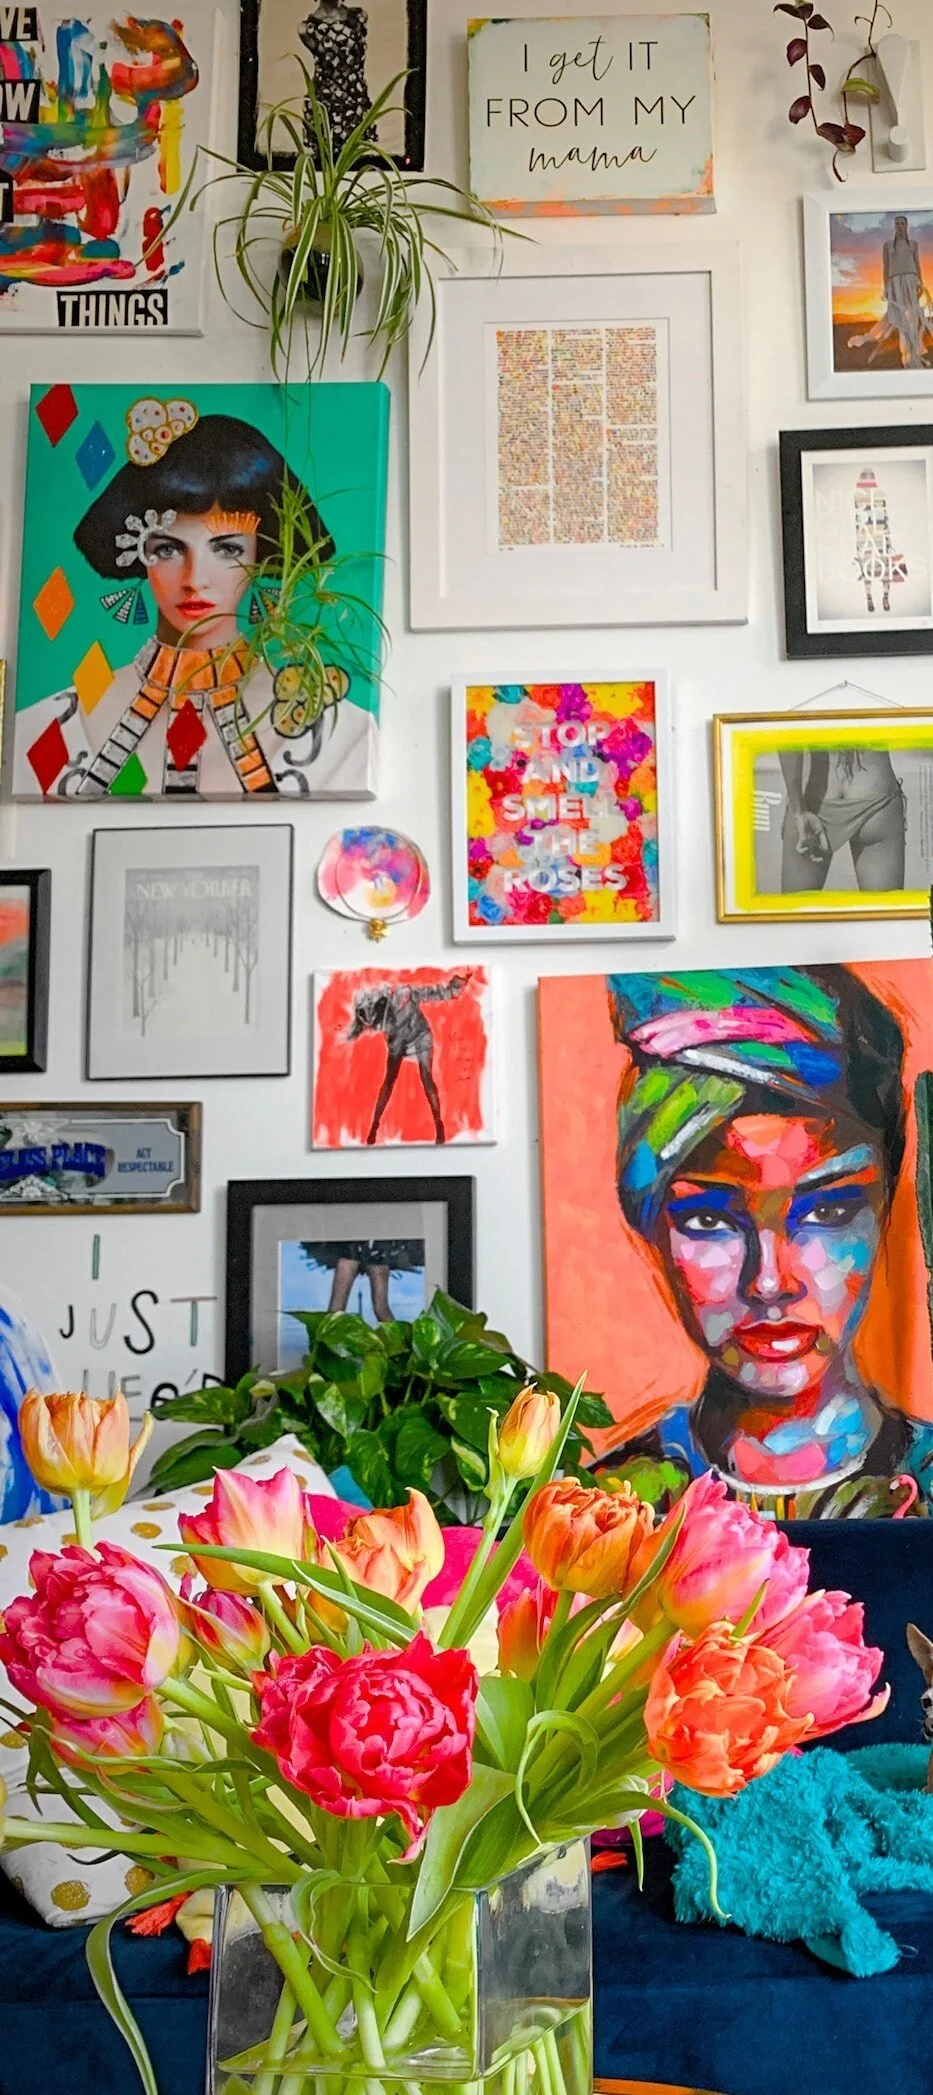
The Transformative Power of Art
In a world filled with ever-evolving technology, it’s tempting to overlook the importance of art in our homes. However, art possesses a profound ability to enrich our lives and create a sense of harmony within our living spaces. Not merely an extravagant luxury, art is
In a world filled with ever-evolving technology, it’s tempting to overlook the importance of art in our homes. However, art possesses a profound ability to enrich our lives and create a sense of harmony within our living spaces. Not merely an extravagant luxury, art is an essential element that can breathe life into the walls of our homes, transforming them into personal sanctuaries of self-expression and inspiration.
First and foremost, art holds the key to unlocking our emotions and igniting our imagination. A carefully chosen piece of art can evoke a range of feelings, from tranquility to excitement or even nostalgia, different to all who view it. Imagine walking into your living room after a long day at work, only to be greeted by a vibrant painting that instantly lifts your spirits and takes you to a place of serenity. Art has an unparalleled ability to awaken our senses, elevate our mood, and infuse our daily lives with a sense of wonder. This is why it is always a pivotal aspect of our interior design process.
Moreover, art possesses the remarkable ability to reflect our individuality and showcase our personal taste. Our homes are extensions of ourselves – they tell our stories, represent our values, and make us feel truly at home. By carefully curating a collection of art, we transform our living spaces into a visual autobiography. It’s an opportunity to display pieces that resonate with our personalities while celebrating the diverse and vibrant world of creative expression.
Art also enhances our cognitive abilities and fosters a sense of intellectual stimulation. Surrounding ourselves with thought-provoking artworks encourages curiosity, critical thinking, and open-mindedness. Art challenges us to interpret, analyze, and appreciate the narratives and symbolism embedded within each piece. Moreover, studies have shown that exposure to art can improve focus, memory, and problem-solving skills, enhancing our overall cognitive well-being. By integrating art into our homes, we create an environment conducive to intellectual growth and creative inspiration.
Furthermore, art can serve as a bridge between generations and cultures, fostering a sense of inclusivity and diversity within our homes, something we love. Art transcends language barriers, cultural differences, and even time itself. By incorporating art from various periods and cultures, we encourage dialogue and an appreciation for the vast array of human experiences. Through art, we can create a unifying space that celebrates our shared humanity, while simultaneously honoring our unique backgrounds and perspectives.
Finally, art enriches our visual environment, making our homes more aesthetically pleasing and nurturing our sense of beauty.
HowTo - Photograph Your Space
In our series of Handy HowTo’s this article covers tops tips on how to best photograph your interiors without hiring a professional. Whether it is pre-project photos showing the space at it’s most basic or finished project images capturing the interiors at their best.

Do you often find that you look at a room, say you’re visiting a beautiful hotel, or you’ve just revamped your home, and you’re blown away (or at least pretty chuffed), by the interior you are faced with. So you lift your camera and snap away, only to be rather deflated by how small, unimpressive or totally different in colour the photo of this space looks once held motionlessly in a snapshot?
This is a very common issue, in capturing many aspects of life but one that is particularly problematic when capturing interiors specifically. It’s relevant to estate agency images (you know how often house details can be misconceiving), or when trying to share a piece of great interior design.
Simply, getting good photos that truly capture your interiors is not always as easy as it looks. There is a reason there are professional photographers that specialise in Interiors as it takes a certain skill and specific approach.
Yes of course there is also a lot of emphasis on editing and the pictures you see of beautiful and inspiring interiors in household magazines are all professionally shot (a professional photographer I am most definitely not). However, there are a few tips that don’t involve an expensive camera or photographic education, when applied can seriously improve your interior photography.
These tips aren’t only for capturing finished projects but are highly useful for obtaining the best photos for showing the space to be worked on when kicking off a design project. Whether this is simply for your own records, like a before and after, or you are using our HowtoHome service, and need to provide some images of the space you are wanting designed. The better the images, the more accurate the finished design will be to your individual space and the more impressive the comparison will be.
Top Tips:
Natural light is pivotal. Light bulbs cast bad shadows and the camera does not have the capability to interpret the artificial light for what it is (as our eyes see it).
Overcast days are actually the best for capturing interiors. Woohoo! that’s a relief in the UK.
Straight lines are king. Basically keep your verticals (i.e. door frames etc) vertical and your horizontals exactly that, horizontal.
Use a tripod if you can so that your images are level and not blurred (more important for images of finished projects).
For capturing: ‘Pre-project’ spaces to be designed - de-clutter and keep the area as open as possible, removing as many items you no longer want included in the new design as possible.
For capturing: 'Completed-project’ spaces - staging is key! Remove all items that aren’t purposeful to your overall aesthetic, making sure there are no used cups and plates lying around for example. Remove and out out of sight any hanging or trailing electrical cables etc.
Creating space - this is the second most pivotal aspect of interiors photography and often one of the hardest. Don’t be afraid to move furniture to suit the composition of the photograph. Even if it wouldn’t work in reality it may look better on the image. Take shots from outside of the space in through the door, at that perfect point where the doorframe isn’t in view. This helps give aspect.
Wide angle - if you have access to a wide angle setting on your phone (0.5 setting on the iPhone 11 Pro) or on your camera, then great, but DON’T abuse it! If you push too wide an angle to capture a room you also risk distorting the actual space and presenting an unrealistic snapshot. Keep it mid range and take multiples instead of trying to get a whole room in one image.
Get up close - it’s all in the detail. While it is important to have an overview of the room don’t forget to get close-ups of notable, well designed or aesthetically important details. These images can work wonderfully to show depth of field, especially if you are able to use settings that blur the background and focus on the detail you are wanting to highlight.
On a camera shoot on RAW setting.
Finally, edit, edit, edit - a seemingly dull picture can be effectively edited to brighten, increase exposure and up the contrast. The main aspects to tweak aside the above are; highlights, shadows and noise reduction.
Most mobile phones have fantastic cameras and editing tools, so go forth and experiment!
Let’s be honest most of us are not taking interior magazine quality images, but that’s no reason not to achieve the best results you can with little effort.
Good luck and have fun.

The Most Inspiring Subscriptions - Our Must have Mags
A short guide to our must read magazines. The publication we pick up on a monthly, bi-monthly or bi-annually basis. Inspiring all we do and enriching our lives.

Asked recently what inspires LitterArty’s work one of my answers was research and reading. I am a huge fan of a good magazine in particular and subscribe to several. Being a strong advocate for sustainable living, some may argue paper magazines are not the way forward and rather contradict the notion. However, I beg to differ, as many magazines (at least the bulk of what I read) are actually processed with sustainability at the heart of their creation. This is done through many avenues, including the use of innovative paper types that use various recycled pulps. If handled correctly these magazines are recyclable too. So there are ways to read physical magazines guilt free!
With the majority of us spending so much of our time looking at a screen, whether computer, phone, tablet or tv, it’s so unbelievably important to have time away from that blue light. Personally I really look forward to spending a little down time kicking back and flicking through a great magazines or book, it feels quite indulgent giving myself that time, pure luxury!
So here are some of our favourite reads for you’re consideration. Any of these would be a great addition to your current reading list. And shock horror, they’re not all Interiors or design driven, but this doesn't mean they’re not equally as inspiring to our work.

Be Kind
I absolutely love this magazine, it is a great read. The articles are fantastically detailed and informative.
A publication more about articles and content than adverts and all those ‘space savers’ used in so many contemporary magazines. The content is broken into easy to navigate sections ranging from creativity, to mindfulness, environmental issues and more.
You can still find lots of great home and interior inspiration, all accompanied by lots of guidance on living sustainably in your home. So while this is a lifestyle magazine and not focused on interiors it is a great tool for living with integrity and brining harmony into your life and therefore your home.
It really is a great one and long may it continue. You’ll find a pile of them in the bathroom and downstairs WC in the LitterArty house, guest love it!
You can subscribe to the monthly editions or pick one up in your local shop.

Happy News
Now this one is a bit different, less of a magazine and more of a newspaper replacement. If you, like us, are sick of negative crappy headlines and bad news, this is your salvation. Page after page filled with nothing but happy (the title gives that away) positive news.
The stories covered shine light on positive happenings across the world, many of the stories you would be none the wiser about if you hadn't perused the pages of this lovely publication.
Each edition is broken in news from each month (you see the only shame is it is quarterly so they can save up all the great things that have happened over the last few months), the pages are crammed with great and uplifting facts and figures. There is also a section on dedications where you can nominate someone you know who has done something great. These personal shout outs are so uplifting in a time when it can be hard to believe in good, there are still lots of us out there!
It’s got a great big thumbs up from us and we look forward to the next edition landing on our doorstep. Ideally consumed accompanied by a good brew and naughty sweet treat.
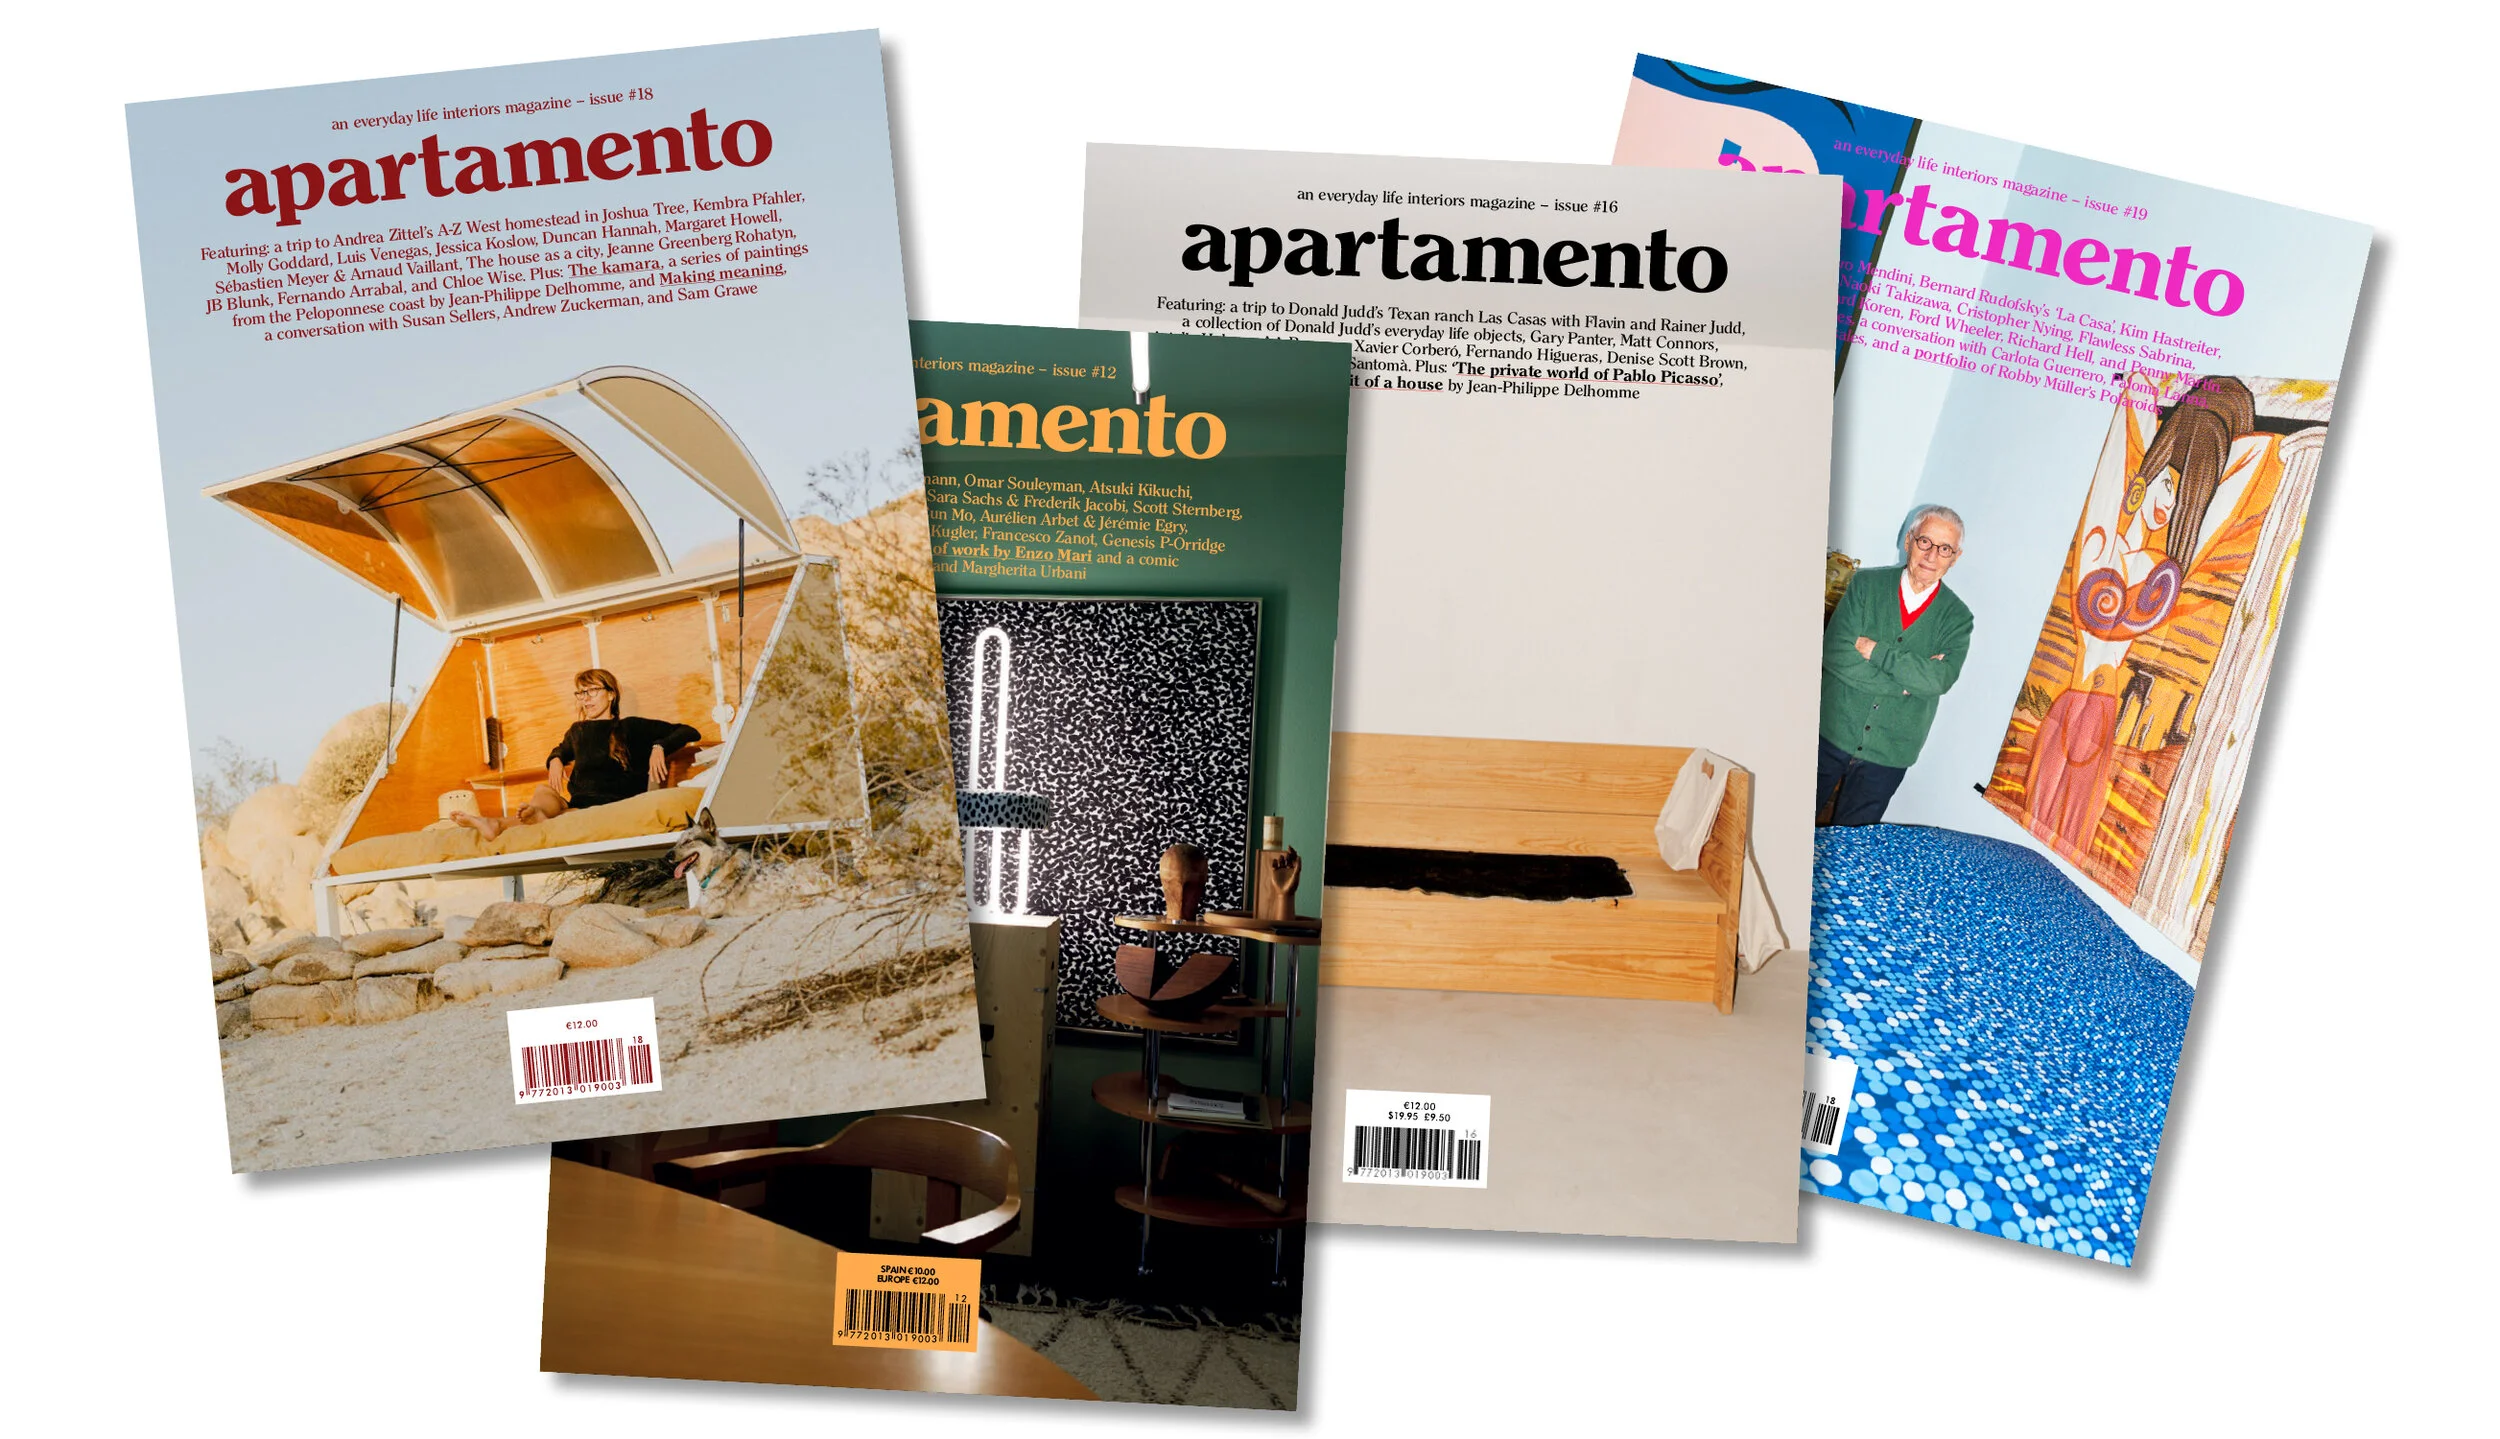
Apartamento
One of my favourite interior driven magazines, pure aesthetic joy!
Published biannually, this visual delight and informative read gives insight in to people, their homes and how they live in them. A through the keyhole style approach. Often selling out in days this magazine became a real cult publication from its inception back in 2008.
Each page presents real ‘lived-in’ interiors, this honest representation is hugely influential and more to the point identifiable and achievable, especially in comparison to the often stark and overly stages interiors featured in many high end magazines across the sector.
That all said there is a definite ‘retro’ aesthetic to the interiors featured and the style of the photography used, so this style of publication may not suit all. For us it’s a spot on edition to our inspiring magazine list and a real staple.

Hole & Corner
A great design source, dedicated to the real craftsmanship and skills behind design, some of which take years or decades to master. It believes in the process and development needed to produce inspiring great design, in the doing not the talking, the pages are therefore filled with articles on such matters.
Contributors include world renowned photographers and authors, which about confirms this publication as a hard hitter in the sector. It’s as thoughtfully put together as the subject matters it covers. A real chunky coffee table style magazine that needs time to devour, which is fine as issued biannually you’ll have plenty of time to enjoy each and every article.
The content leaves you inspired and in awe of some amazing craftspeople who have dedicated their lives to the development of their skills and craft.It is therefore only fair that we dedicate some of our time to reading about it. In doing so, opening our eyes to amazing people all over the world that would otherwise go under the radar.
A really great, worthwhile read, especially if you appreciate authenticity and heritage!

91 Magazine
Independent magazines are my kryptonite and 91 doesn’t disappoint.
Focused on more affordable and attainable interiors and lifestyle (right up our street). This publication offers up a smorgasbord of beautiful visuals and accessible lifestyle tips, with a sustainable focus (double thumbs up).
Content is broken in to sections each with a theme, this runs in each magazine with each section focusing on a specific place or person, changing each edition. From news, to shopping, to restaurant and home tours. The articles cover lots of interesting aspects of lifestyle. I actually love the home tours sections in particular, they are dotted through out and feature interesting people in their (as the title would suggest) homes. The restaurant tours are also really great as they discuss the atmosphere, decor and ethos of a place rather than the style of most restaurant reviews that predominately focus on food critique. Along with these tours, there’s a cool section called 3 ways with, and each magazine features a different subject matter.
Finally, there is a very current cultural focus on social media and instagram in particular. Love it or hate it, it’s part of most of our lives and a real source of visual inspiration. They therefore feature an instagram edit showcasing chosen accounts again based on a chosen theme, i.e. Handmade or Craftsmanship.
Just an enjoyable read featuring real people for real people, with the added advantage of being visually pleasing and calming.

Oh Comely
Recently reimagined simply as Oh! this is another independent magazine with oodles of creativity and female empowerment. Already sold?…Well let me tell you a little more.
The ethos behind the magazine is about looking at the way you view the world and yourself. Jam packed with full pages of colourful images and text, featuring articles on a vast array of subject matters such as; fashion, music, food and culture.
It’s essentially offering up a different approach to a wellbeing magazine, all the articles have the end goal to encourage mindful actions and in doing so a the creation of a less stressed more balanced lifestyle.
Published bi-monthly you can subscribe or pick it up at some supermarkets. I great one for those looking for a female driven read.

Breathe
I think we all need to take time to breathe and with magazines like this you can have a helping hand. Full of great tips and articles on ways to self care, something all too many of us neglect.
This monthly mag breaks down in to healthy chunks on wellbeing, living, mindfulness, creativity and escape. Each section packed with its own content ranging from sleep tips and exercise routines, to ways to be more creative or guides on how to make something. Each article is informative without being preachy, which I love, there’s a fine line between the two as we all know.
They also do special editions and journals that enable you to doodle, list write and contemplate.
I have picked up several varieties of mindful and wellbeing magazine and this is by far my favourite. Just the way it flows and the style of the illustrations and articles. Available at most shops and supermarkets where you’ll find the magazines, go check it out!
other faves include: Disegno, Frieze, Frame and Resurgence & Ecologist.

HowTo - Spatial Plan
Our quick and handy Howto guide on spatial plan, helping you to make the most of your room and guide you with furnishing. Part of LitterArty x HowtoHome’s handy HowTo series.

It can be daunting sometimes working out how and where to fit and position furniture in any given space. While there is some level of subjectivity based on personal comfort and requirements, there are a few handy rules to help you establish suitability of furniture and not end up in a situation where things don’t fit or the space isn’t accessible.
How to ensure you have enough free space?
A general rule of thumb is to allow approximately 50cm (minimum) of space from one piece of furniture to the next. There are of course exceptions to this rule such as the distance between a console table and the back of the sofa or next to a bed. In cases where your aim is to have one support the other and be in close contact then obviously this rule does not apply.
In hallways and passing places it’s advisable to up this minimum and allow at least 80-90cm of space so that the area doesn’t feel cramped and walking past objects and items of furniture is a challenge.
Top Tips:
- Consider where fixed obstacles positioned, such as doors, windows, radiators and fireplaces. You need to allow space around and plan furnishings that will fit around these features and balance out the space.
- Think about volume and don’t over fill a space.
- Ergonomics - ensure that there is a circulation passageway through a room. This follows an easy pathway from the door to all the other main areas of activity.
- Edit your clutter, clutter brings in spaces and creates a sense of chaos. By minimising clutter you optimise your space, yes it’s common sense.
Questions to ask:
1) What, is the space used for, what are its functions?
2) Who, uses it? How many people does it need to accommodate etc.
3) How, do you want the room to feel? Spacious, airy, cosy, minimal….
4) Are there focal points? Or do you need to create focal points?
Another question we are regularly asked is; What is the optimal distance between a TV and your seating? Again, a general rule of thumb is to base this on the size of your TV, take that measurement and times it by 1.5 to 2.5 to gauge your most comfortable viewing distance. So for example, a 37 inch TV could be positioned around 6 ft from your sofa for optimal spatial planning. Obviously, this is relative and subjective to personal comfort but it’s not a bad rule to stick by.
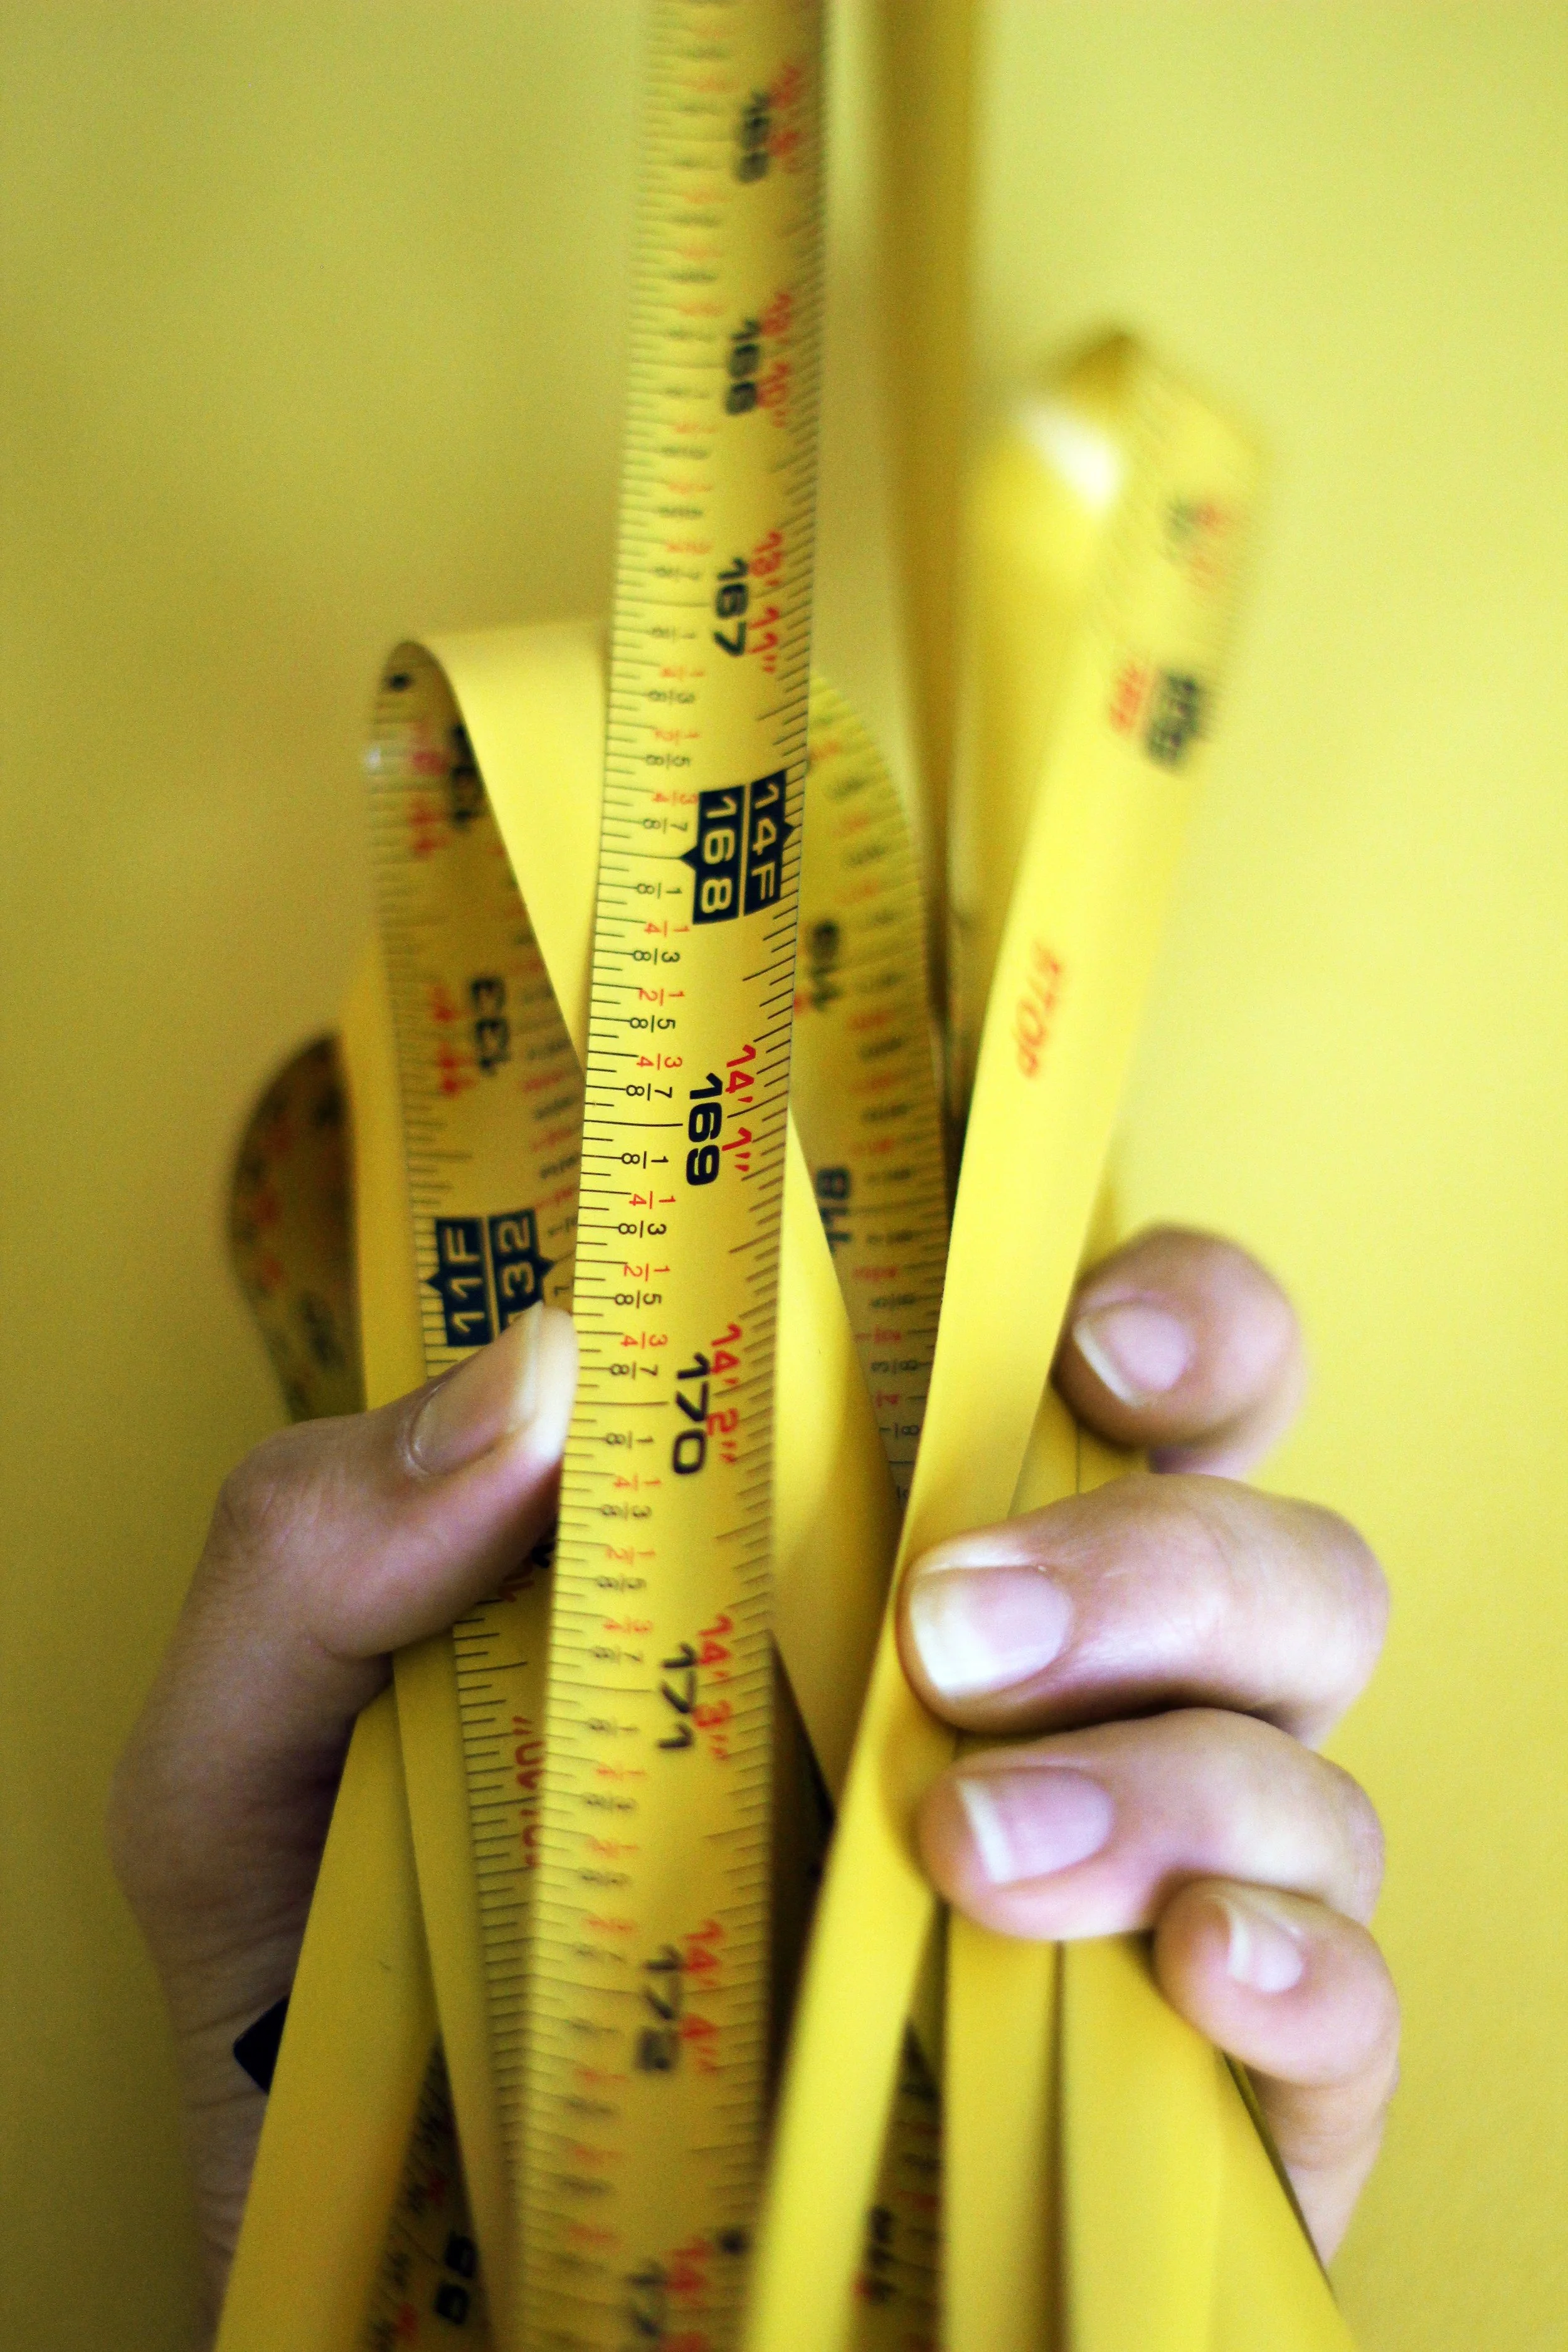
HowTo - Measure a Room
Our quick and handy Howto guide on measuring a space. Part of LitterArty x HowtoHome’s handy HowTo series.
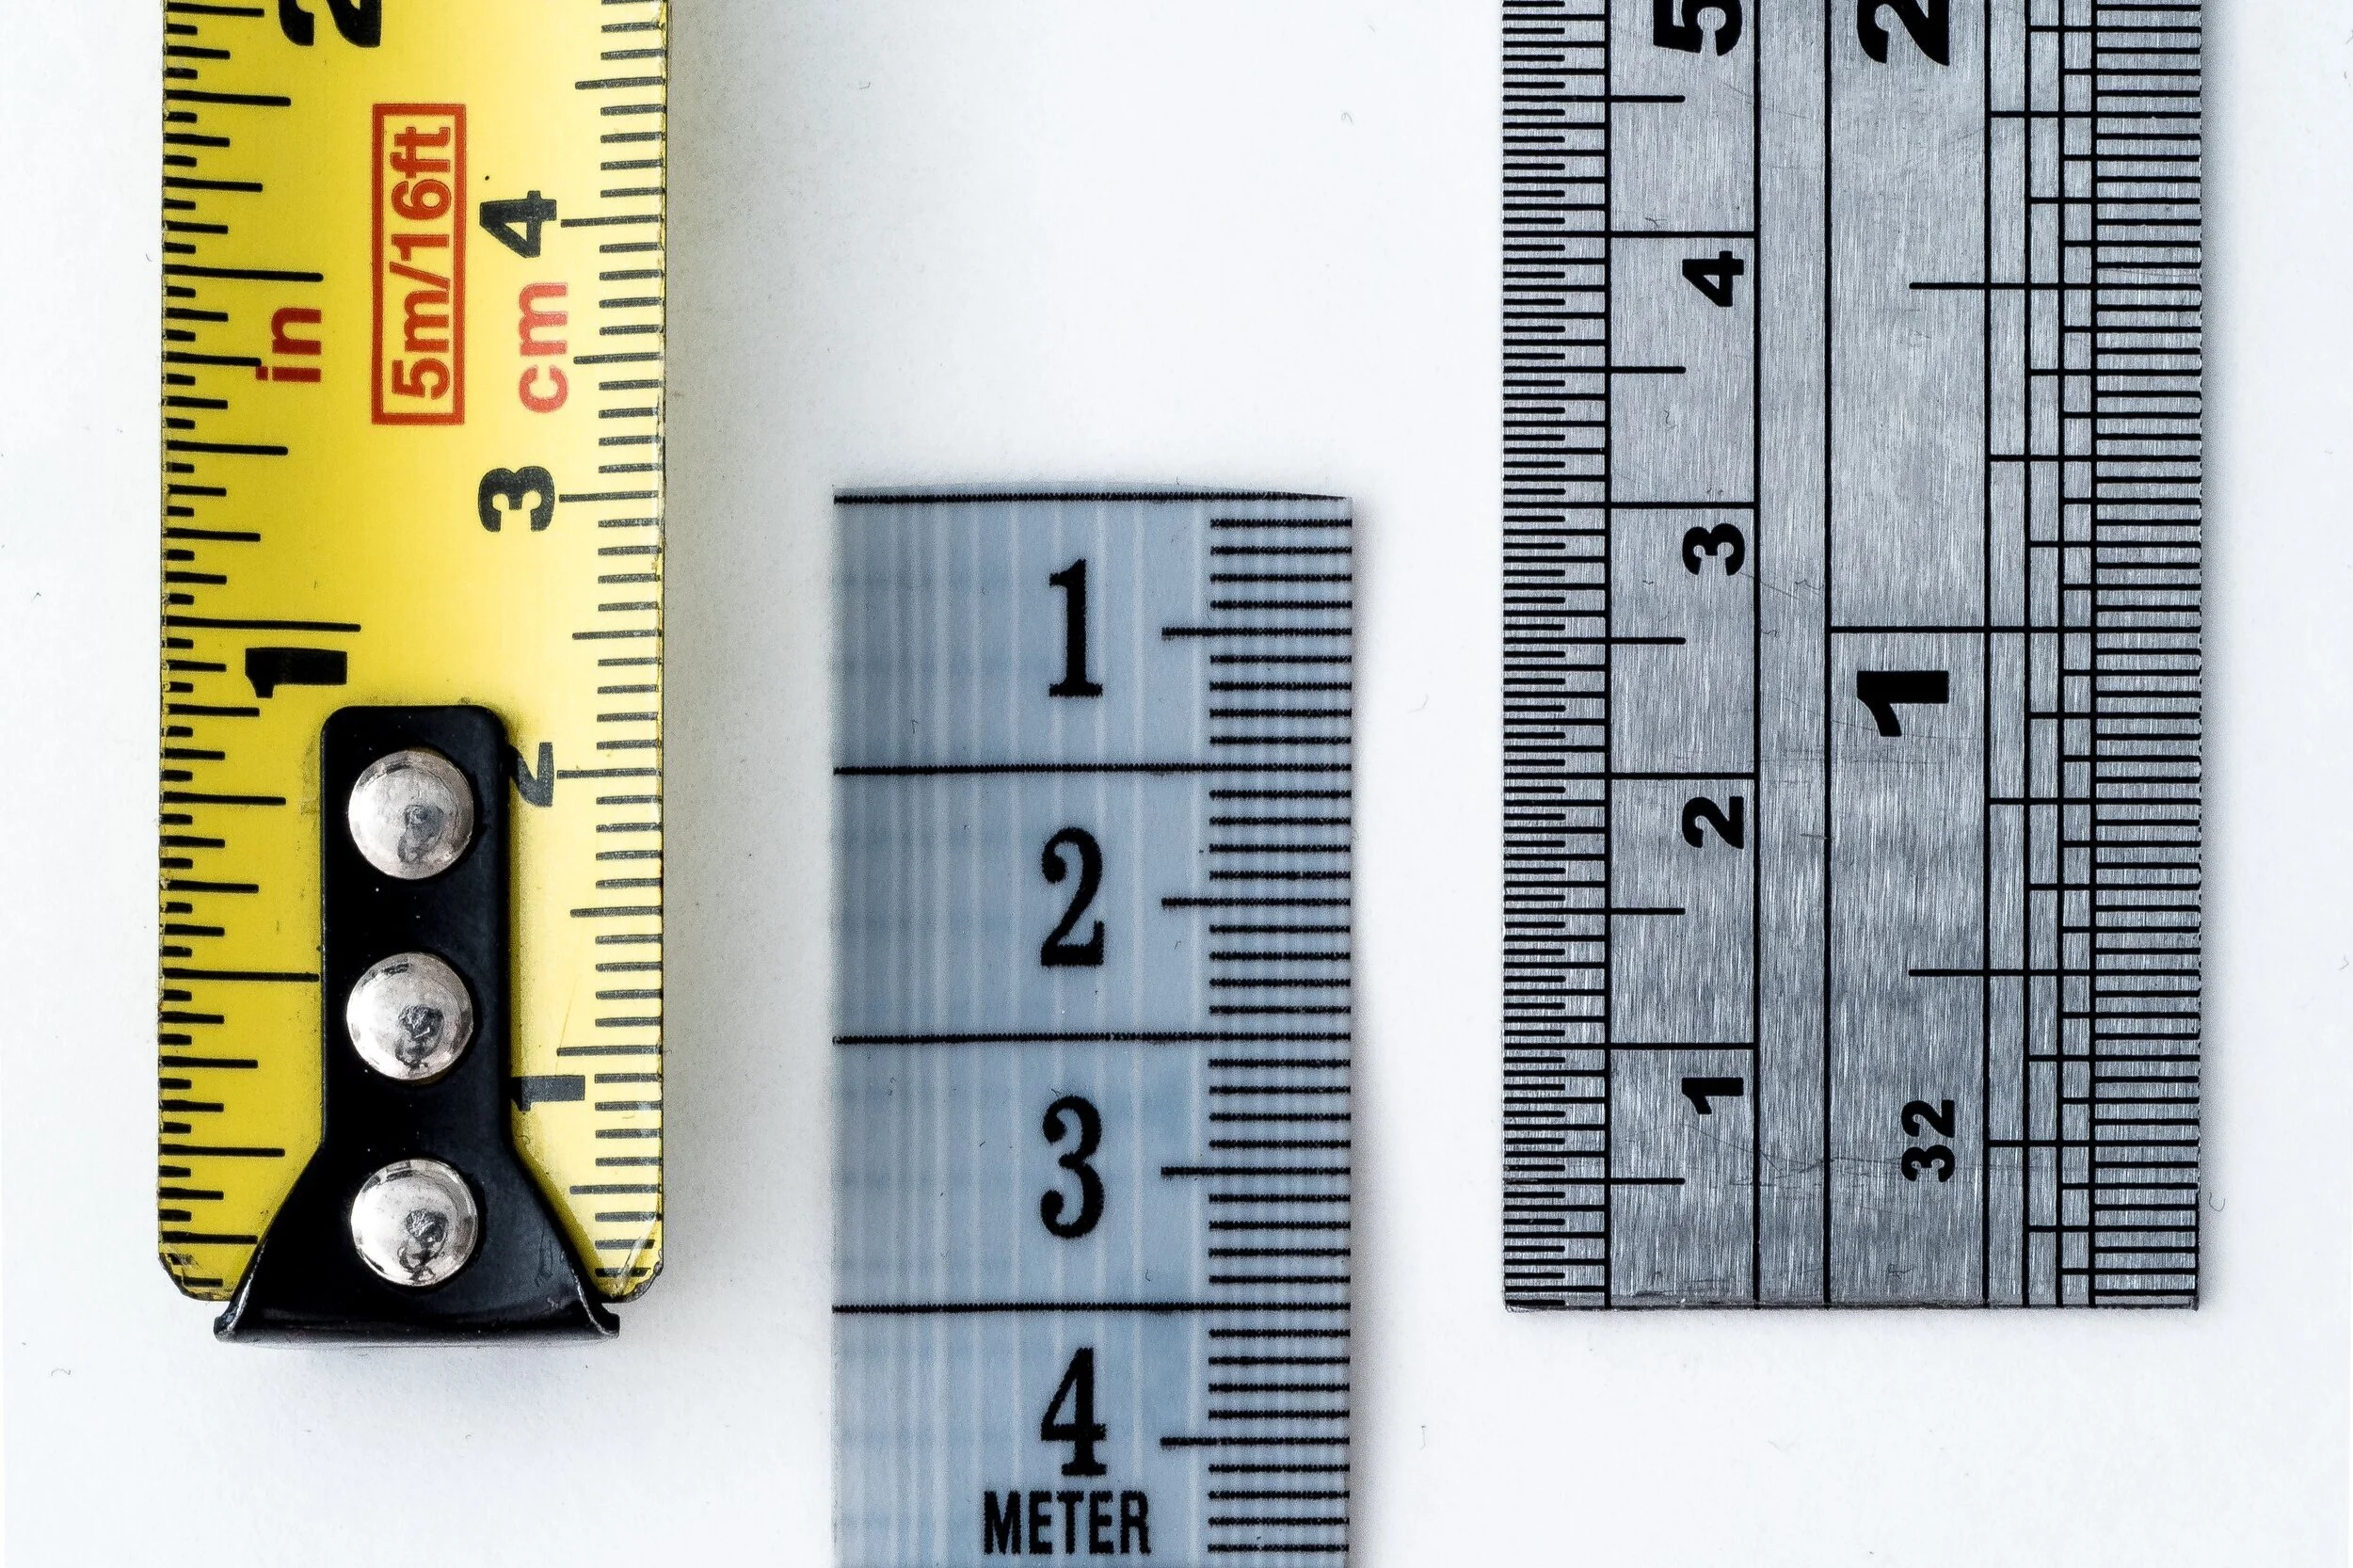
1. Make sure you have a sturdy and decent length tape measure. This simply makes life easier and means you can measure quickly.
2. Have a paper and pen to hand for notes and to quickly sketch out the outline of your room. All you need is the general shape, no need for accuracy as long as it makes sense to you.
3. Mark window and door locations.
4. Start by measuring the width at the longest point of the room, the same with the depth and then the height.
5. Then take at least the same measurements at around 5 points across the room. This helps with accuracy, as most rooms are nor 100% even. 6. Next measure all large elements such as alcoves and other nooks. Do this by following the same principle as above (width, depth and height). Note these measurements in the correct locations on your room outline.
7. Measure all the windows and doors. You want to know the width and height of the opening and then also the height of the window base from the floor. Again mark this on the outline.
8. Make notes of all utility and socket locations i.e. radiators, sockets, aerial points. To measure their exact location, measure from the nearest fixed point (i.e. edge of the wall in a corner) to the middle of the fixture. This is particularly useful for radiator location.
Tips
- When measuring the height of your room, make sure you allow for picture rail and cornice height. This is relevant for walls where you are wanting to feature wither freestanding or built in units such as shelving that require to sit within these parameters. Make notes where relevant.
- Doorway measurements are pivotal for planning furniture as well as the layout design, it’s all well and good picking great furniture but what if the space to get it in to the room is limited?! All these details help.
- Not location of any architectural features that are relevant or limit design decisions.
- Clear detail is key!

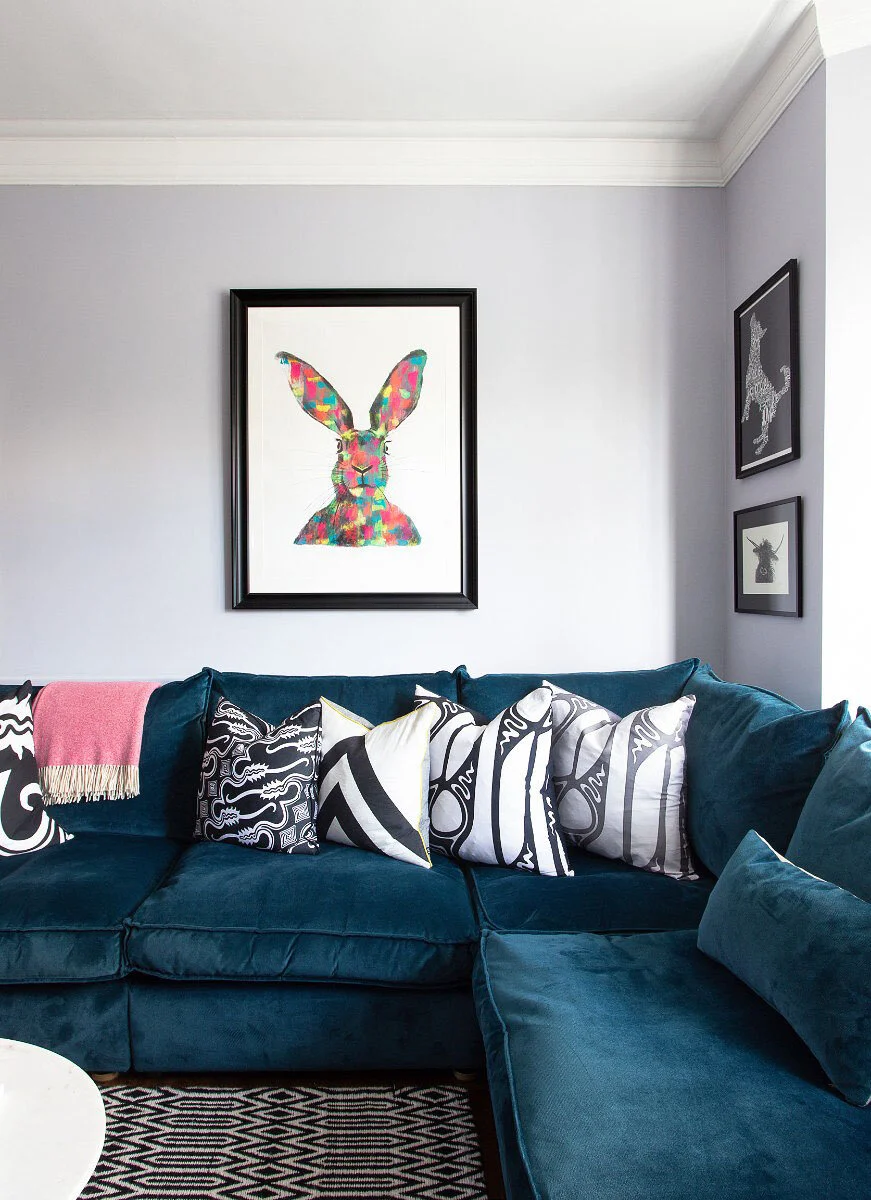
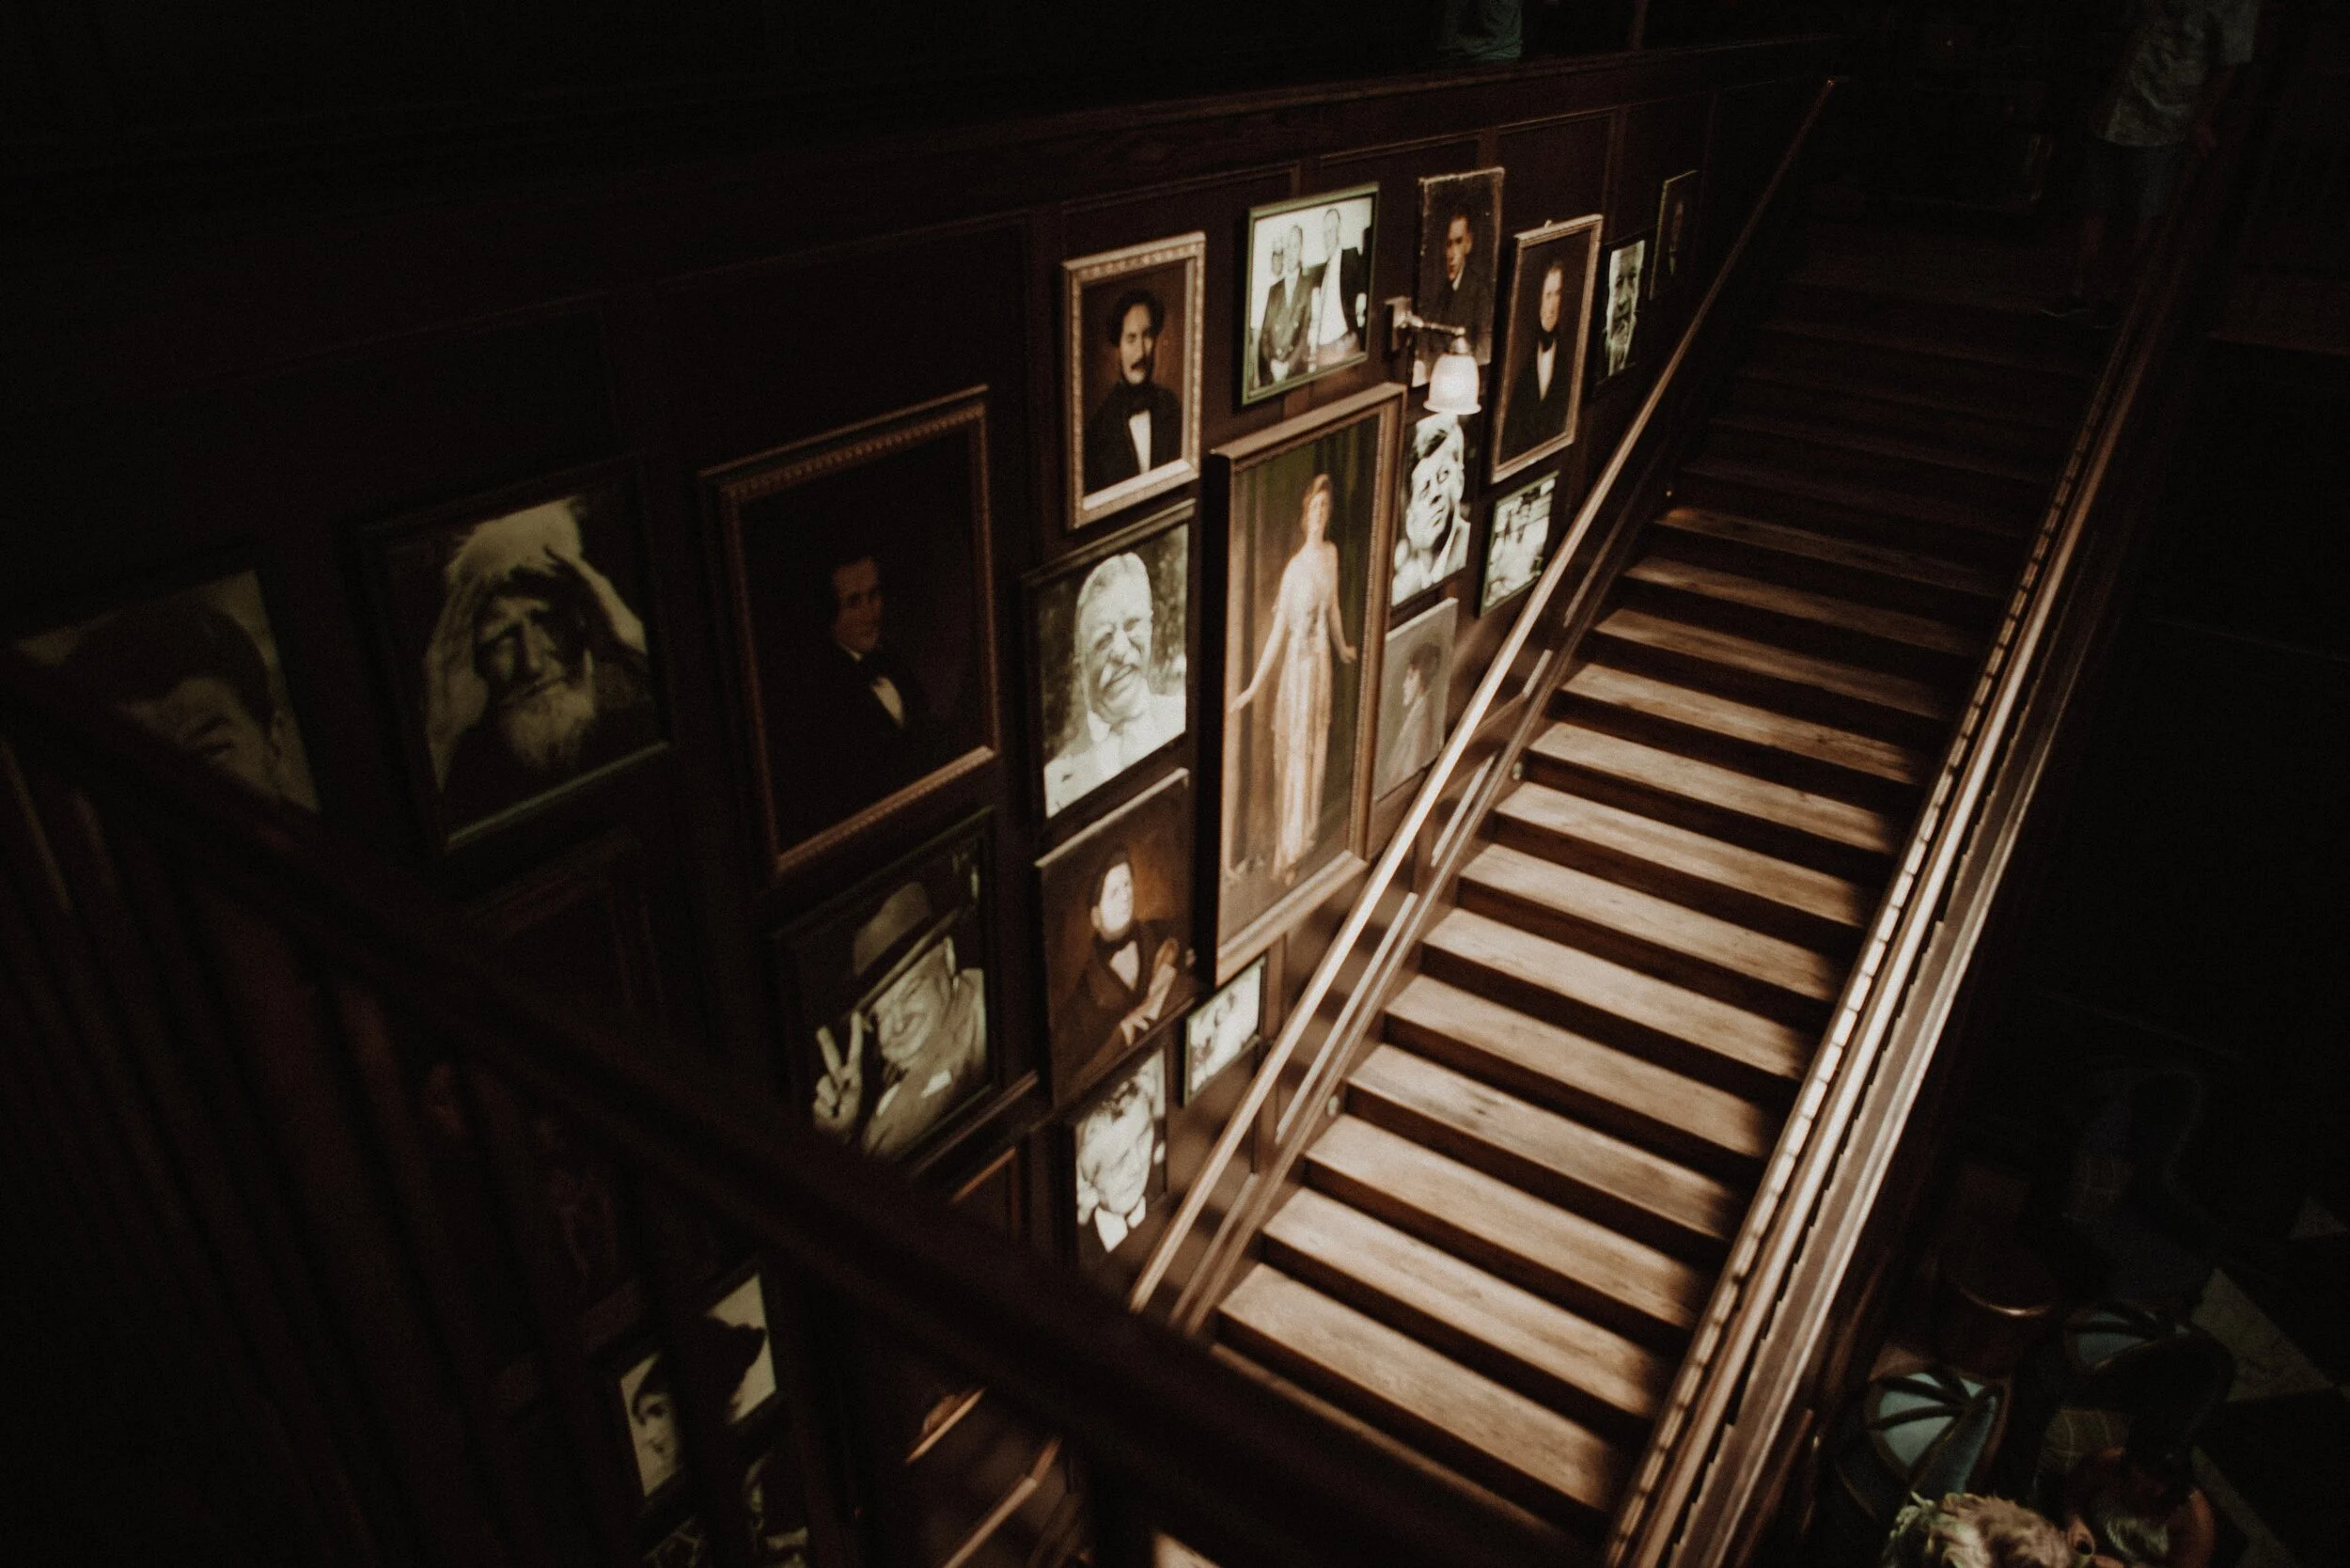
HowTo - Hang Pictures
Our quick and handy Howto guide on picture hanging. Part of LitterArty x HowtoHome’s handy HowTo series.
To get you started, here is a check list of tools and equipment you may need to hang pictures securely, safely and successfully.
- Tape Measure
- Pencil and Rubber
- Spirit Level
- Hammer
- Drill (if hanging heavy work that requires a wall plug and screw)
- Picture hooks and nails
- Wall plugs and screws (if required)
- Cord or wire for hanging.
Before you grab the hammer and start attempting to hang your picture, you need to make a few practical decisions, such as, where you want it hung and is the wall structure suitable. You also need to decide how much support you’ll need to hang your picture securely, whether single or multiple hooks etc. Once you’ve established the location and hanging equipment needed follow there are some basic steps to follow for hanging. Whether you are going for a relaxed or a traditional museum approach this is a great base point. All rooms are different and the museum approach may not be appropriate for your décor.
Step 1 – Measure
Take a width measurement of the wall you are hanging your chosen picture on.
Step 2 – Align with the centre of the wall
Find the centre point of the wall by halving the overall width and place a small pencil mark.
Step 3 – Determine the Height
Most people hang pictures too high; you should not have to strain your neck to see them. There is a bit of a science to picture hanging. That said, this is where your subjective style comes in, whether following the museum approach or not.
Relaxed approach
If you're confident with your artistic abilities, use your eye to judge where to hang your painting. This will allow you to balance your furniture, doors and windows. Just makes sure it's at a comfortable eye level. If not follow the next step:
Technical/Museum approach – a simple equation
1) Measure 145cm from the floor this is the ‘ideal’ middle point of your picture.
2) Measure your picture and half it, this is the centre point. This is A.
3) Measure the tension depth from the top edge – pull the picture cord/wire to full tension as it will be when hanging. This is B.
4) Find the height by doing this simple equation – 145 + A – B = Height to position your nail.
Handy tips
- A lot of plastered walls, particularly in older properties can crumble when a nail is hammered in. To protect your surface from damage or marks place a small piece of masking tape over the point for hanging. This will help to protect the nail point from causing damage.
- If your frame is heavy or slightly rough on the reverse place some small sticky felt pads on the reverse bottom two corners just away from the edge. This will pad and protect from rubbing or movement works on the wall.
- Use a spirit level to double check how level your picture is by placing it on the top and then the bottom of the frame, adjust accordingly.
- 5-7cm between frames is a great rule to apply.
Hanging a Picture Wall or Cluster
Follow the same three steps, measure, find the middle width and determine height, then add the following step:
Additional Step 1 – Line up the centre, making the centre of the cluster/picture wall sit along the 145cm centralised mark.
Hanging Pictures on the Stairs
Dependant on your desired overall look, you can plan this intuitively or structured. If going down the structured route add the following step:
Additional Step 1 – measure 145cm from the floor, this should be the centre of your first picture.
Additional Step 2 – measure 145cm from every second to third step to form a diagonal line. This line should be the centre of each picture and then use the size of your frames to position each picture at an equal distance to space out most effectively.
Hanging a Scattered Display
Choose a piece as a central focal point. This will form the middle of your cluster. Then follow these steps:
Step 1 – Measure up your 145cm point to find the middle point of your central picture.
Step 2 – Build your gallery from the middle out, making sure you balance your pictures as you go. Always ensuring the central line stays at 145cm.
This process is very subjective to what you see as ‘balanced’ so go with what suits you and suits the pictures and artwork you love and are wanting to hang.