
Bring the outdoors in - Biophilic Design - A practice for wellbeing
Biophilic design, the practice of incorporating elements of nature into the built environment, has gained significant popularity in recent years. This innovative approach harmoniously blends the world of architecture and interior design with the power of nature, resulting in spaces that promote physical well-being, enhance productivity, and create a sense of tranquility.
Central to biophilic design is the understanding that humans have an innate connection to nature. As urbanization continues to rise and people spend more time indoors, this connection becomes increasingly crucial. By integrating elements like natural light, greenery, water features, and natural materials, designers can create spaces that not only look beautiful but also serve as sanctuaries for the human psyche.
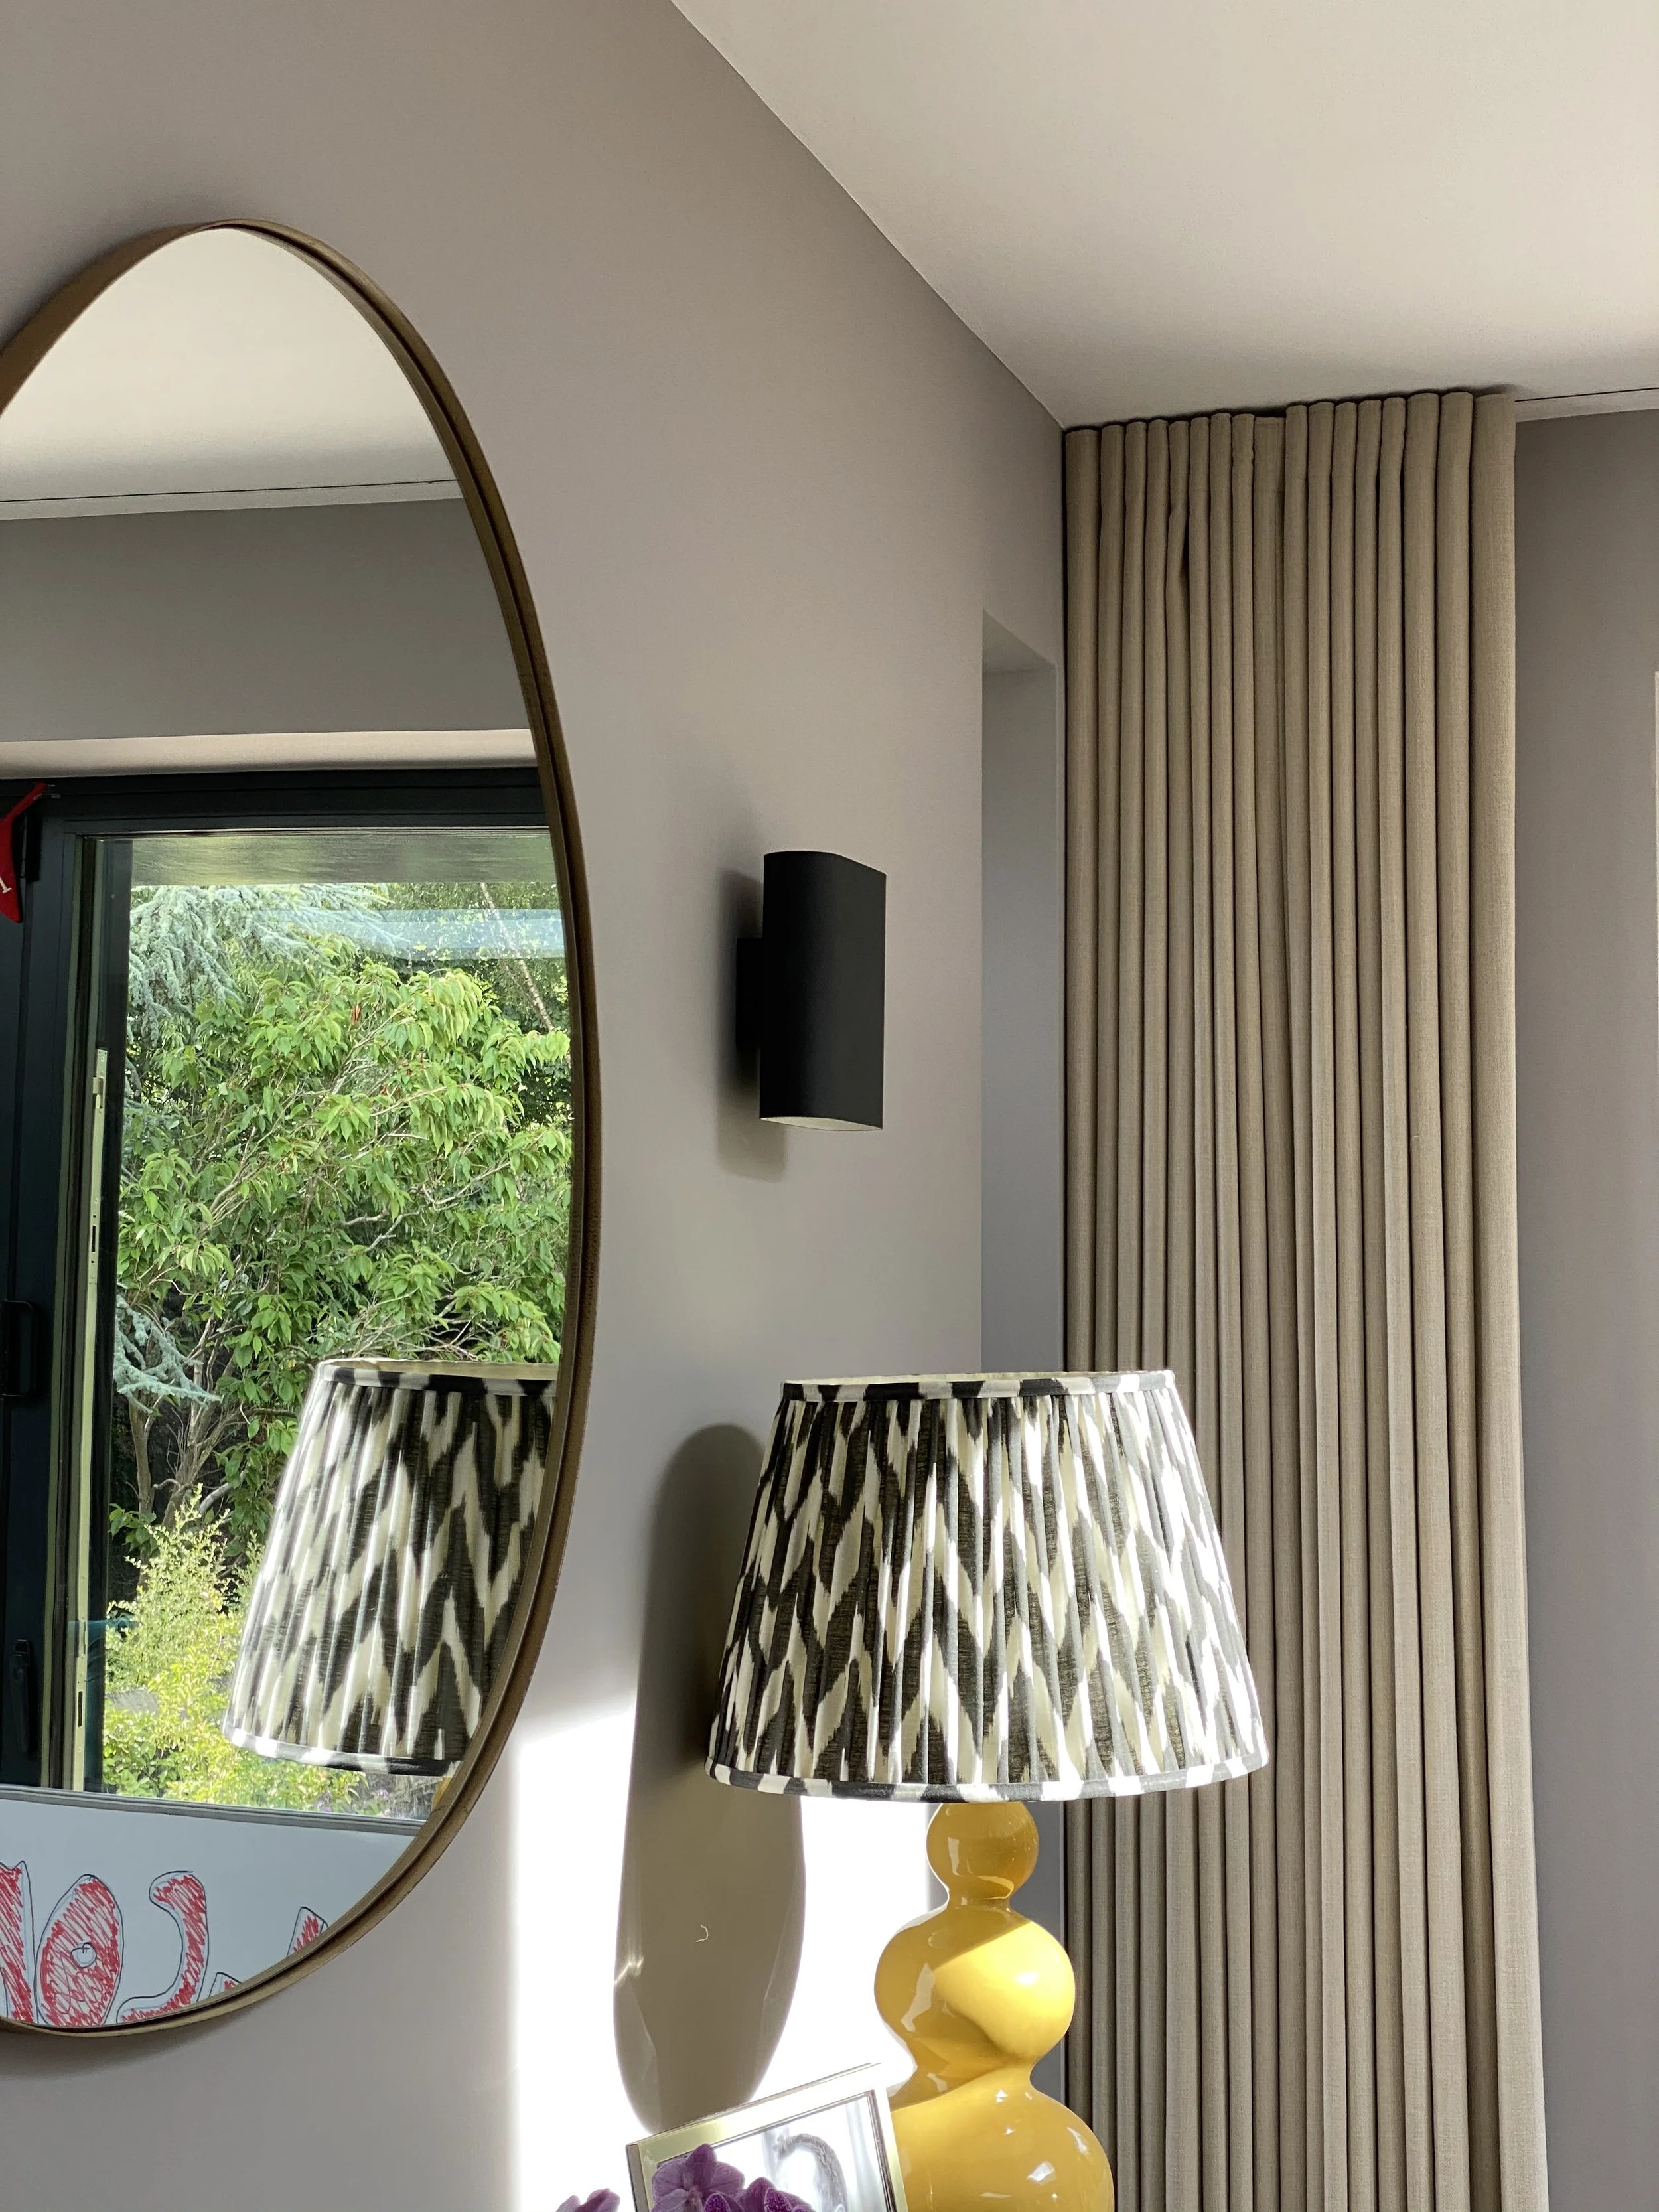
One fundamental aspect of biophilic design is the utilization of natural light. Maximizing the use of daylight not only reduces energy consumption but also provides occupants with the ever-changing, dynamic qualities of natural lighting. Large, strategically placed windows, skylights, and lightwells allow for the penetration of sunlight deep into the interior, creating vibrant and uplifting spaces. This connection to the outdoors through light fosters a greater sense of connectedness to the surrounding environment.
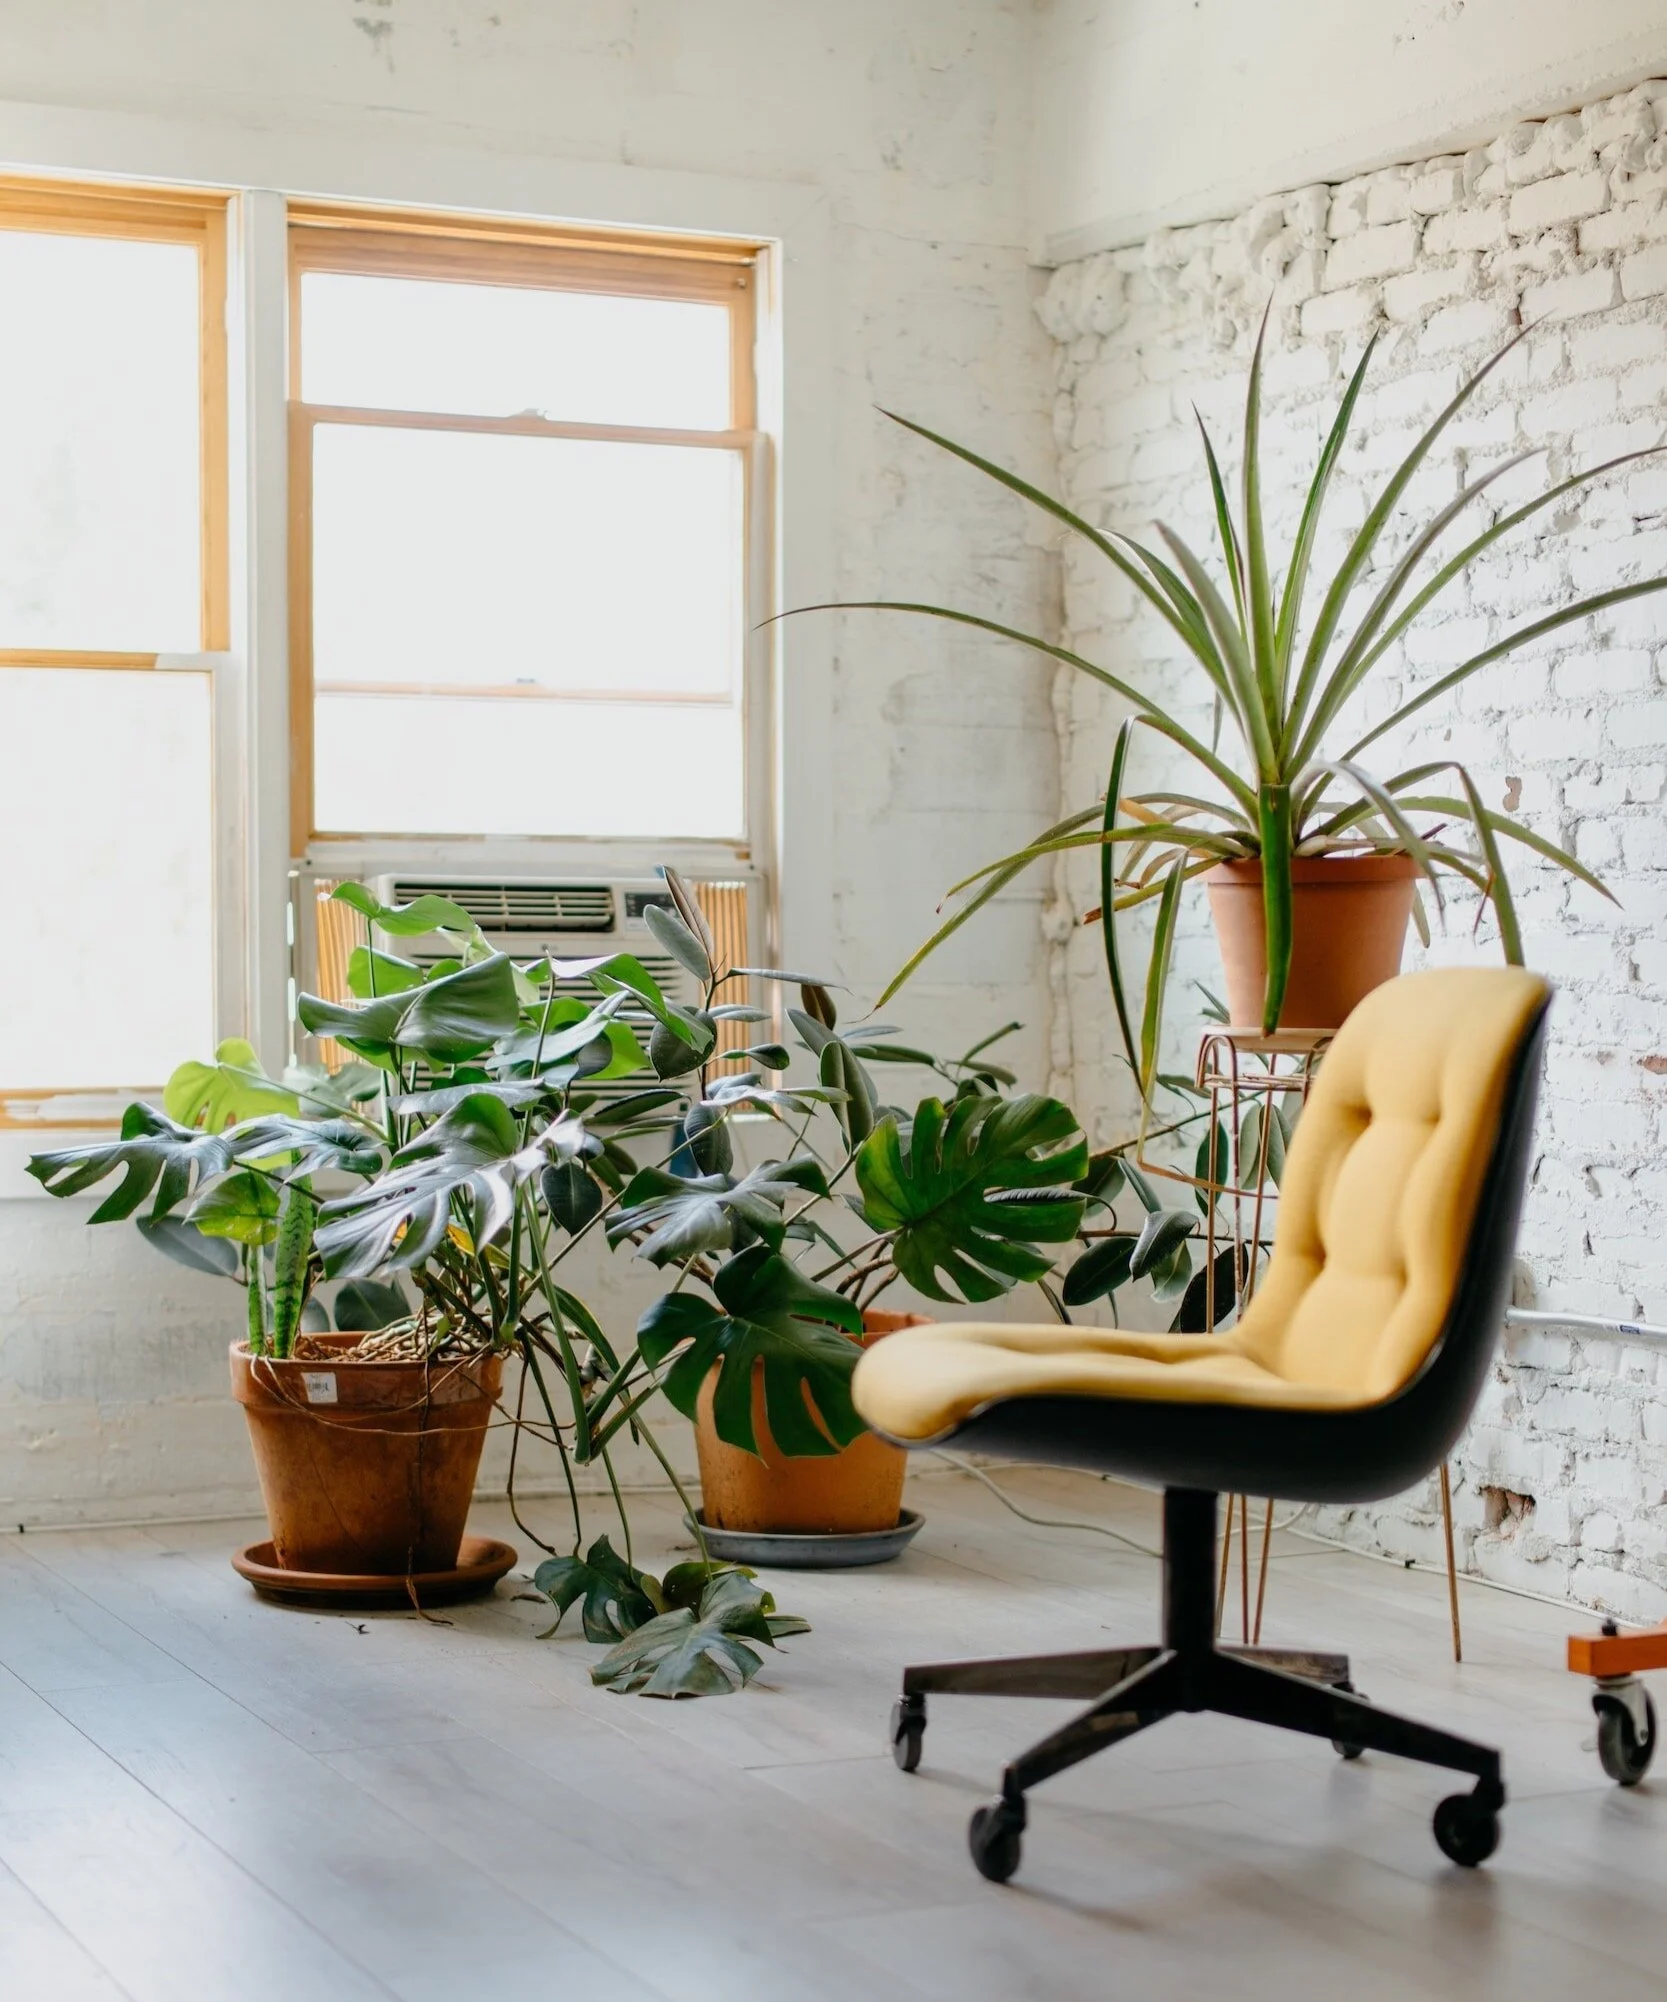
Greenery plays a vital role in biophilic design, as it connects us with nature through the inclusion of plants, living walls, and even indoor gardens. Not only do plants purify the air, but they also provide visual stimulation and a calming effect. The presence of greenery has been proven to reduce stress levels, boost creativity, and enhance overall cognitive function. Incorporating plant life into interior spaces ensures a sense of freshness and vitality, bringing a touch of nature's serenity indoors.
Water features are another key element of biophilic design. The soothing sound and visual presence of water create a calming atmosphere that helps to reduce anxiety and promote relaxation. The incorporation of elements such as indoor waterfalls, fountains, or ponds can transform any space into a peaceful retreat. Water acts as a natural separator, providing privacy while simultaneously connecting different areas, enhancing the overall flow and harmony of the space.
Using natural materials is essential in biophilic design as they evoke a connection to the earth. Wood, stone, clay, and other organic materials bring a sense of warmth and authenticity to interior spaces. Not only are they aesthetically pleasing, but they also contribute to the overall well-being of occupants by improving indoor air quality, sense of self and calm that only nature can instil.

Transformative Power of Colour
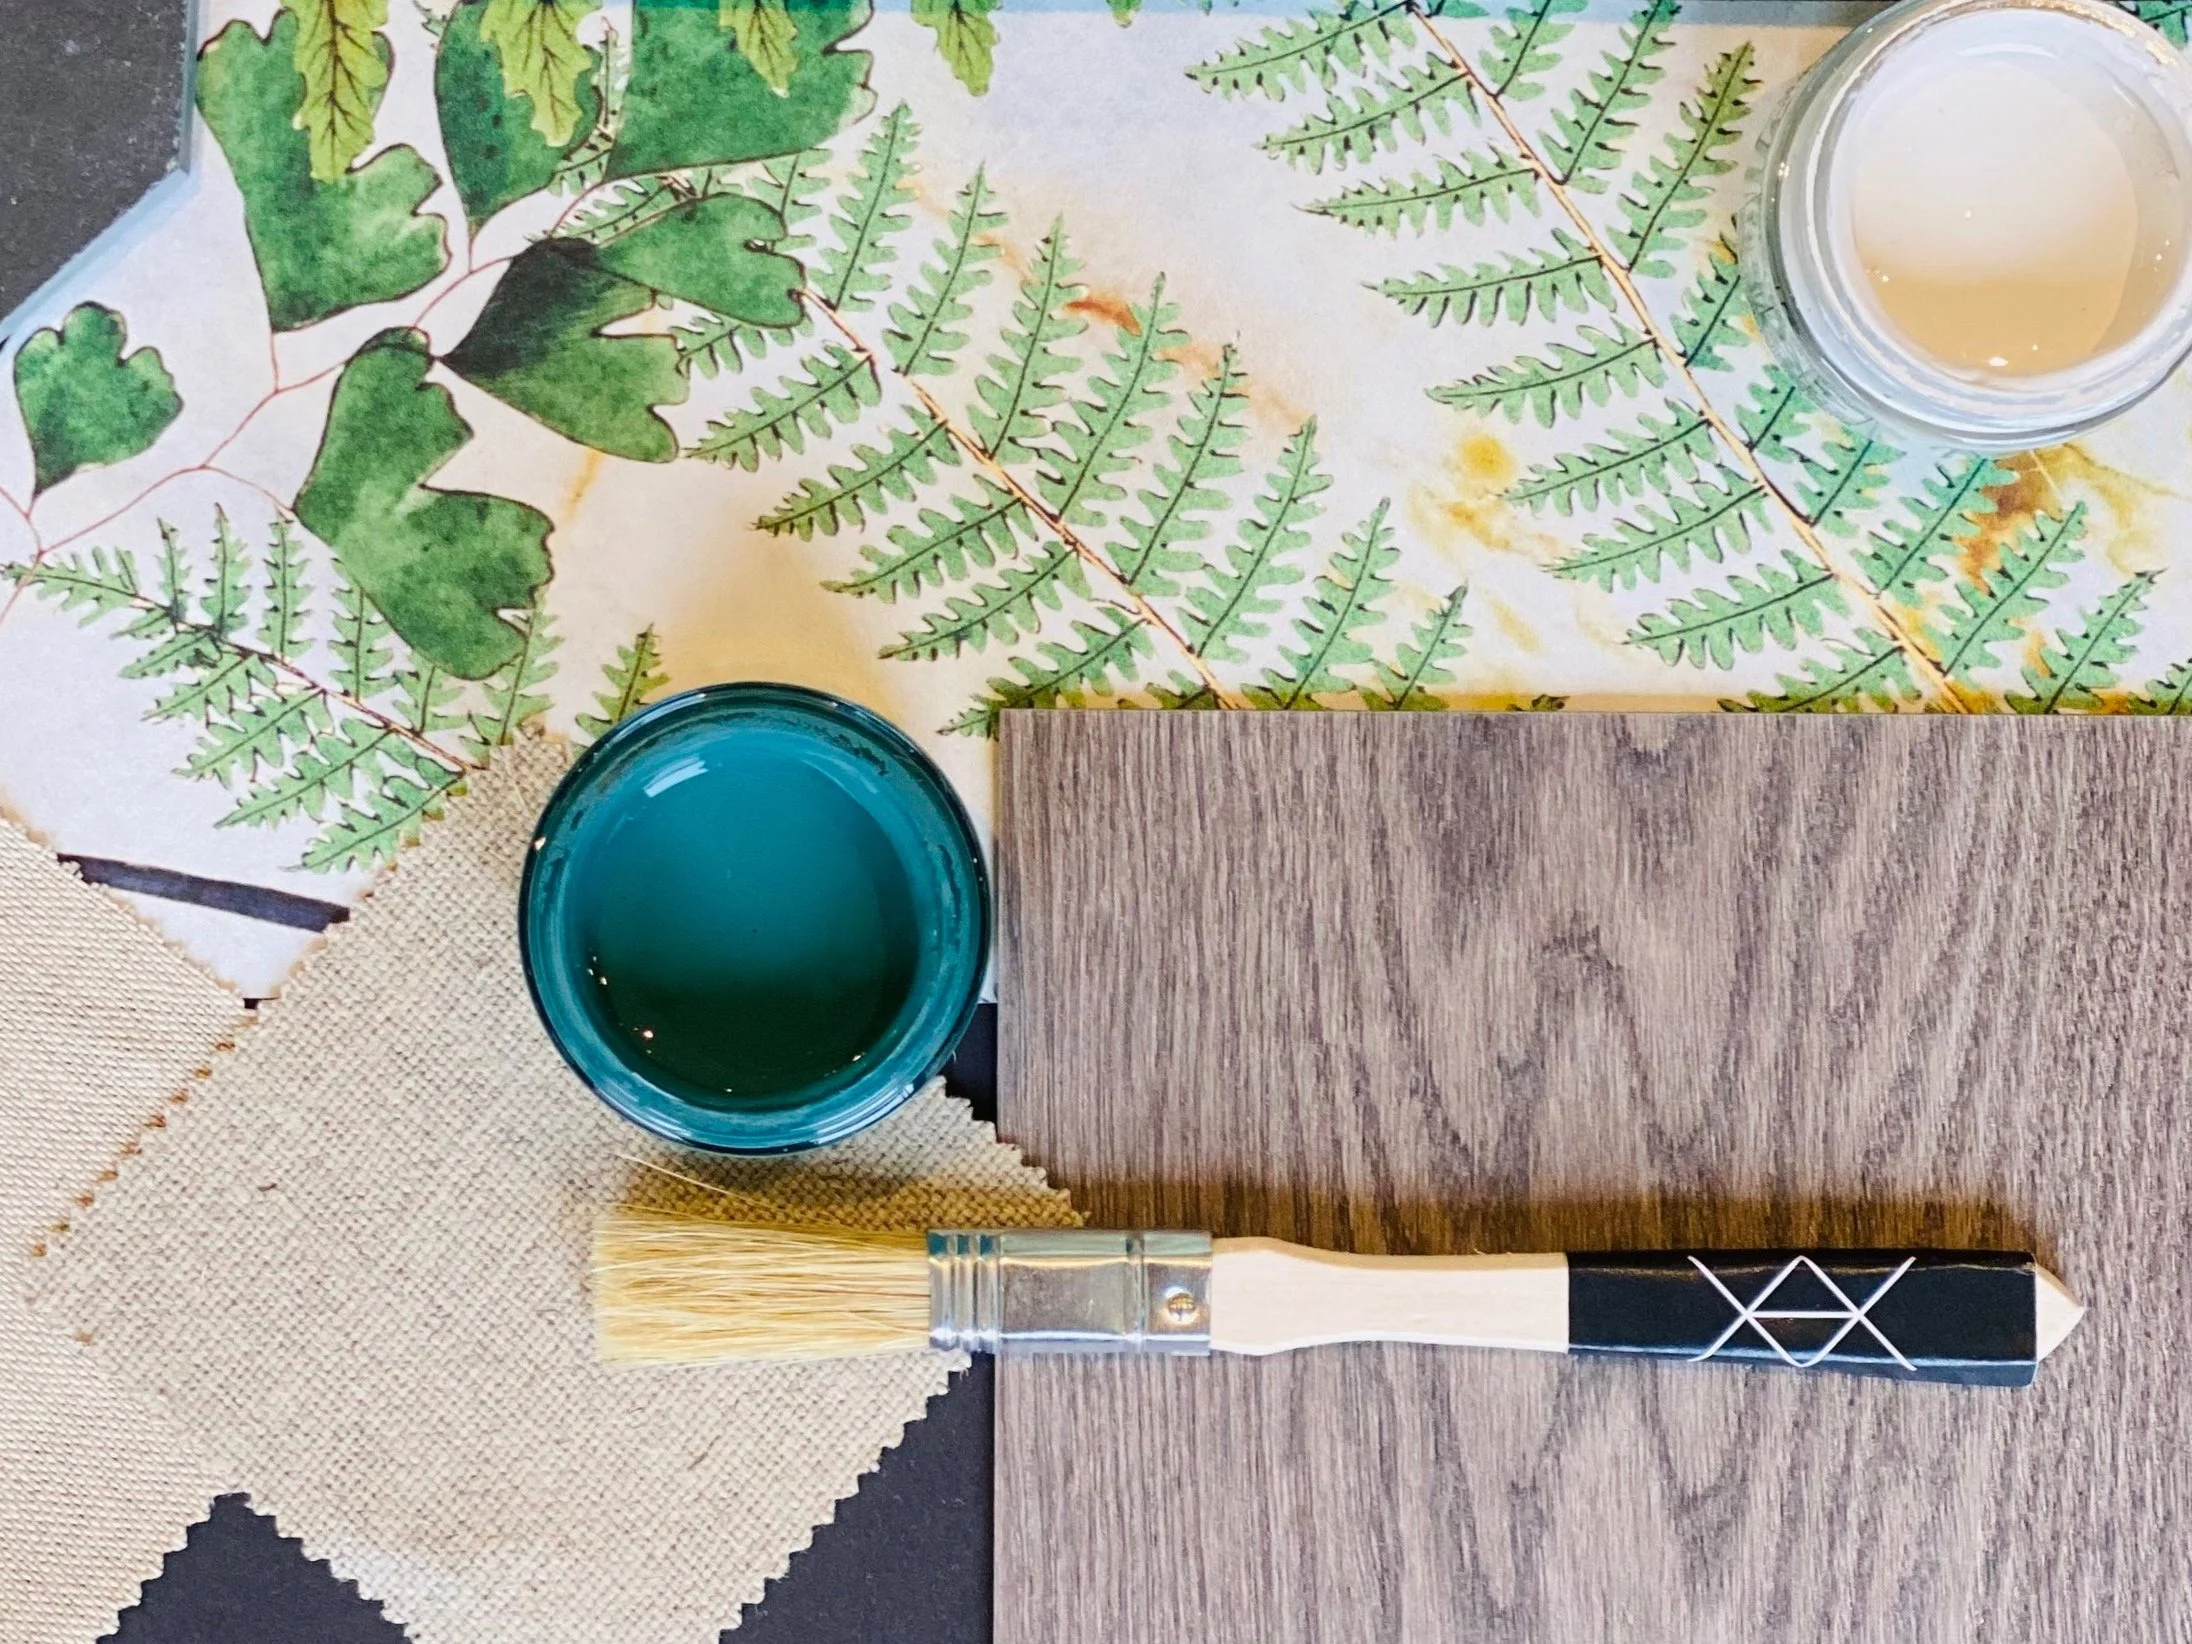
Colour has an incredible ability to uplift, inspire, and transform the atmosphere of a space. From the soothing hues of blue to the vibrancy of red, the careful selection and application of colour can have a profound impact on the overall aesthetic and mood of an interior. Whether it's a residential abode, a commercial space, or even a public area, the transformative power of colour can create a truly immersive and captivating experience.

Colour has an incredible ability to uplift, inspire, and transform the atmosphere of a space. From the soothing hues of blue to the vibrancy of red, the careful selection and application of colour can have a profound impact on the overall aesthetic and mood of an interior. Whether it's a residential abode, a commercial space, or even a public area, the transformative power of colour can create a truly immersive and captivating experience.
One of the most noticeable effects of colour in interiors is its ability to influence emotions. Certain colours can evoke a sense of calm and tranquility, while others can ignite passion and energy. For instance, a light and airy room painted in soothing pastel tones can instantly create a serene and peaceful sanctuary. On the other hand, a vibrant red accent wall in a dining area can stimulate appetite and create a lively and stimulating atmosphere. Colour has the power to communicate messages and evoke specific emotional responses, allowing designers to curate desired experiences for those who occupy the space.
Furthermore, the strategic use of colour can also enhance the perceived size and functionality of a room. Lighter colours tend to make a space feel more spacious and open, while darker shades can create a sense of intimacy and coziness. In small rooms, the use of pale hues on walls and furniture can visually expand the boundaries and make the area feel more expansive. Contrarily, in larger spaces, the clever application of darker colours on select walls or features can create a sense of depth and comfort. By understanding the principles of colour psychology and spatial perception, designers can manipulate the visual aspects of a room, transforming its dimensions to suit intended purposes.
Additionally, colour has the power to showcase individuality and personal style. A well-chosen and thoughtfully executed colour palette can be a reflection of the occupant's taste and personality, making a space feel truly unique and customized. Whether it's a bold and dramatic combination or a harmonious blend of complementary shades, the right use of colour can impart a distinct character and make a space feel authentic and welcoming. By carefully considering the desires and preferences of the client, designers can select colours that resonate with their personality and create an environment that truly feels like home.
Essentially, the transformative power of colour in interiors is undeniable. From influencing emotions to altering perceptions and showcasing individuality, colour plays a pivotal role in crafting a memorable and impactful interior design. By harnessing the communicative and sensory properties of colour, designers can create truly effective and beautiful design that does good.
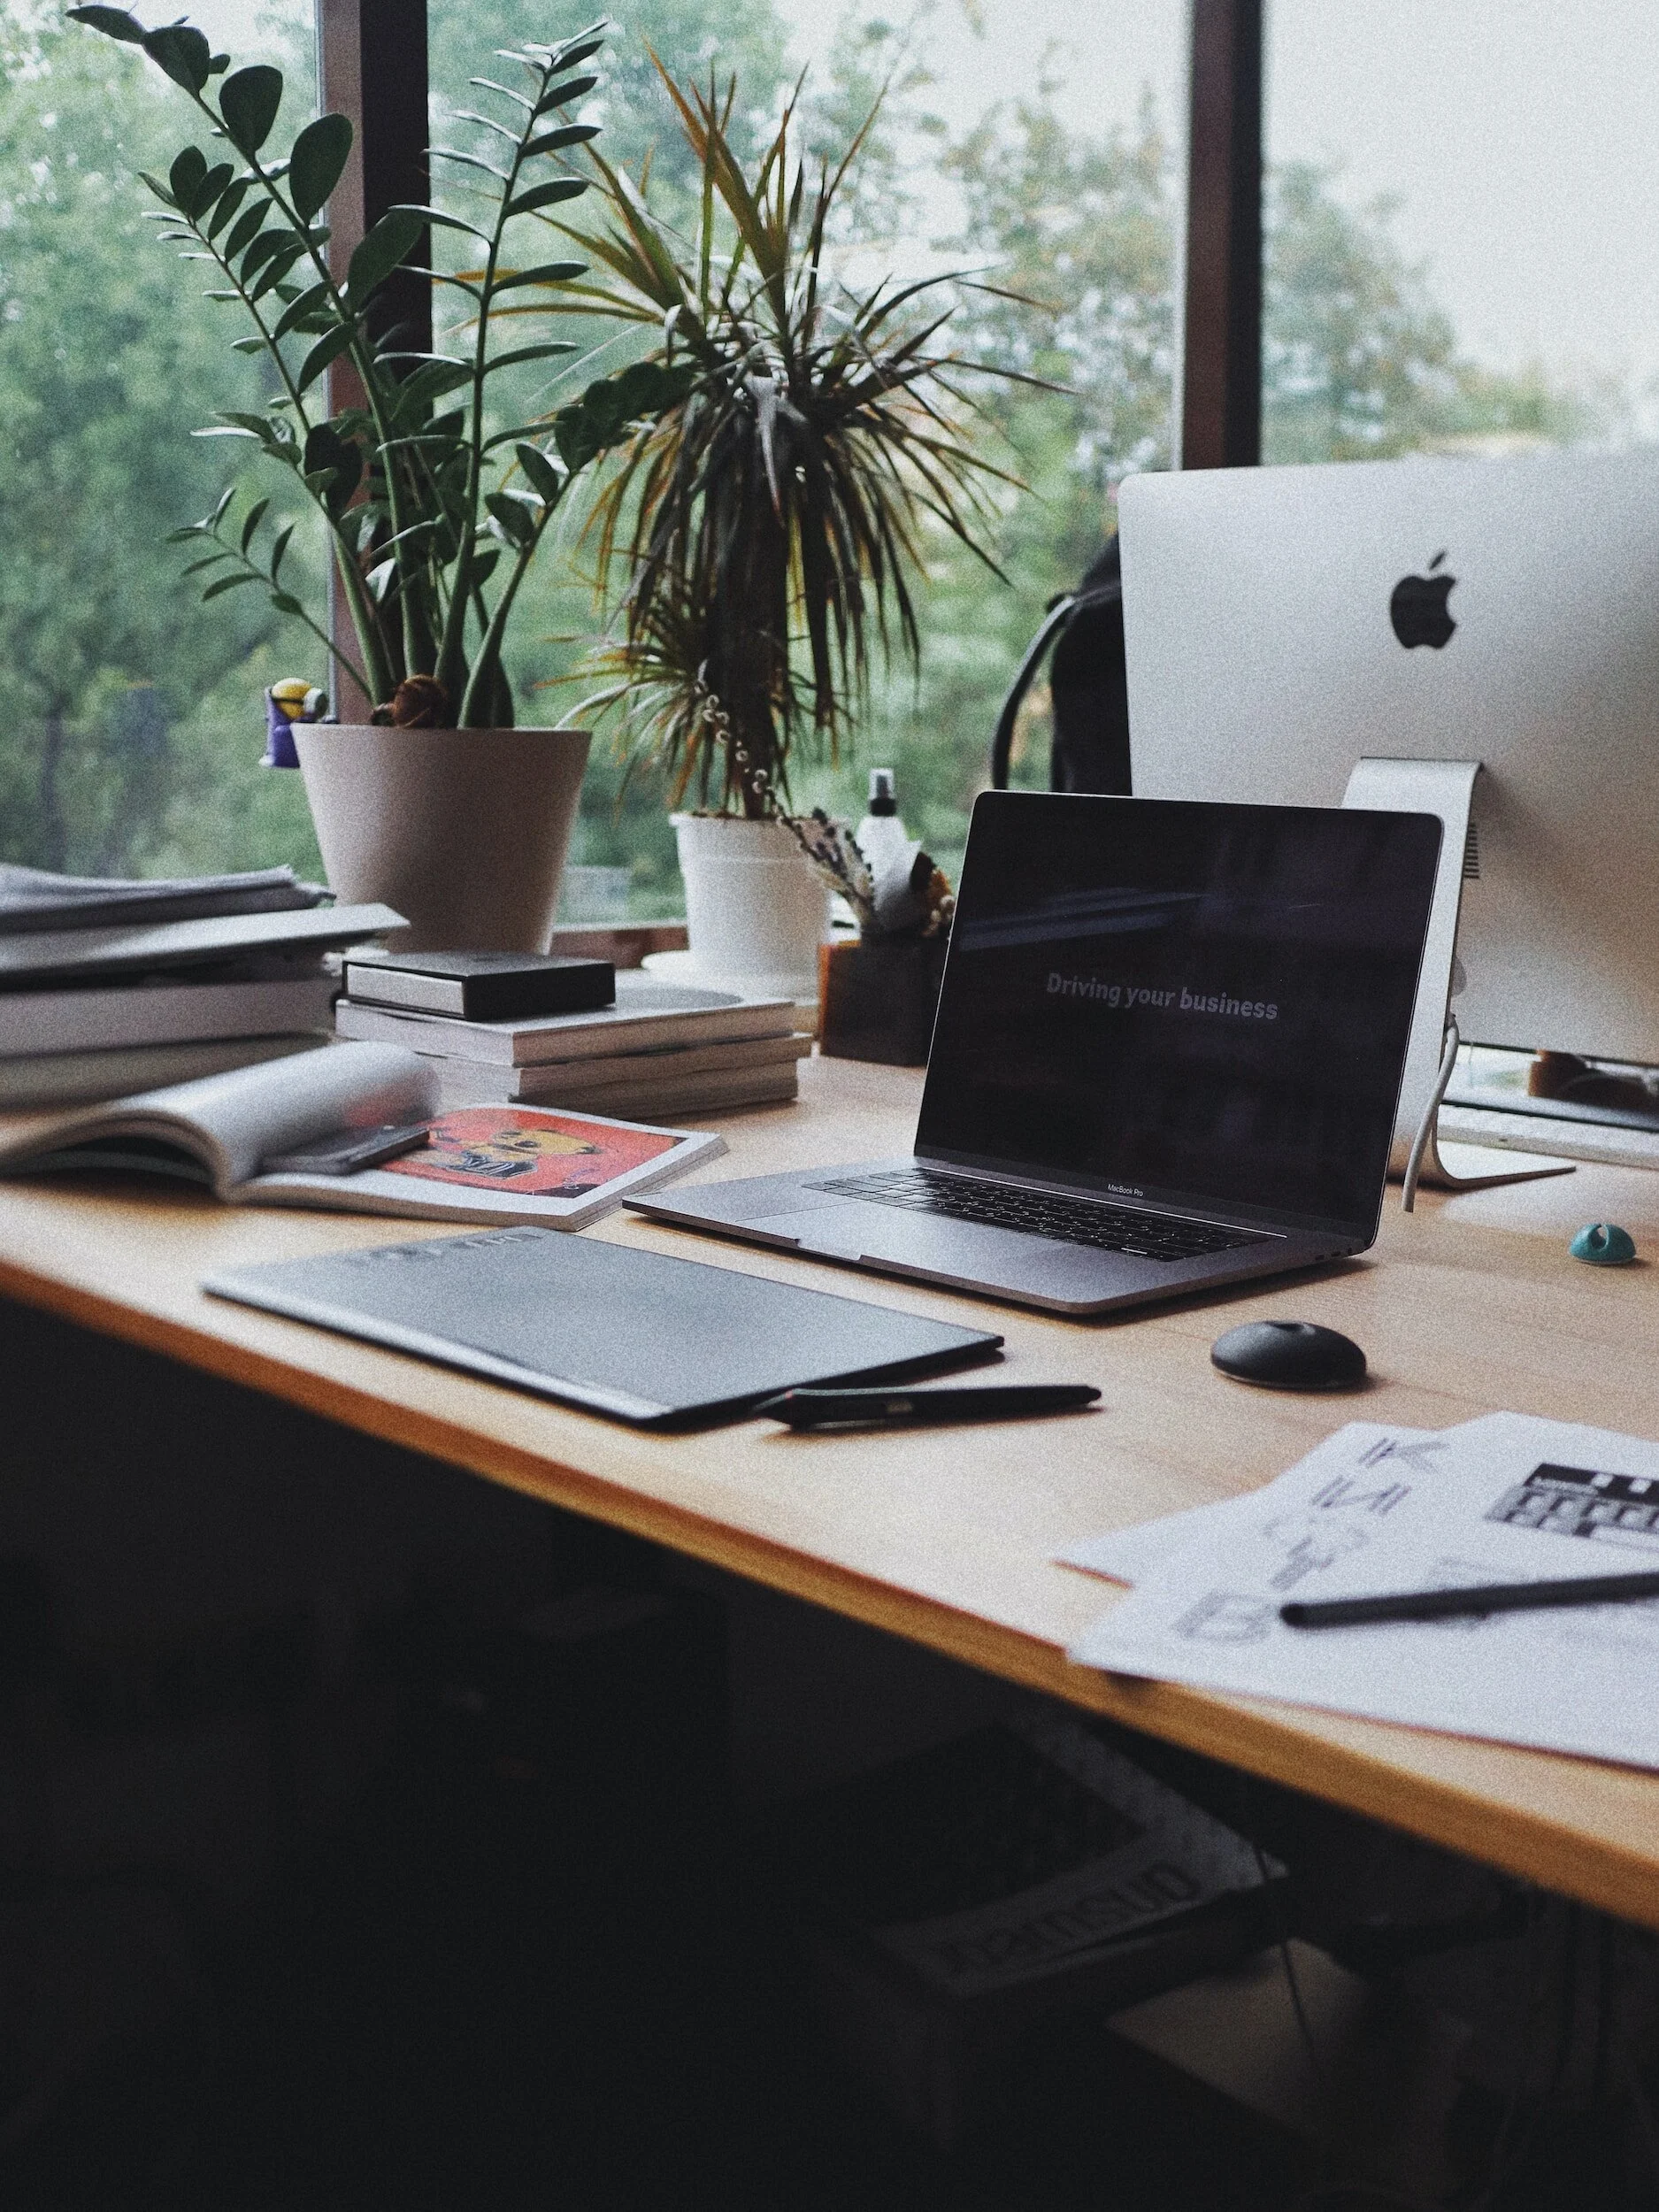
The Rise of the Home Office
In recent years, the home office has experienced an unprecedented rise in popularity. Driven by advancements in technology and changes in work culture, more and more individuals are transitioning from traditional office spaces to the comfort and convenience of their own homes. With this shift, interior design professionals have been challenged to create functional and aesthetically pleasing workspaces within the confines of residential properties.
In recent years, the home office has experienced an unprecedented rise in popularity. Driven by advancements in technology and changes in work culture, more and more individuals are transitioning from traditional office spaces to the comfort and convenience of their own homes. With this shift, interior design professionals have been challenged to create functional and aesthetically pleasing workspaces within the confines of residential properties.
One of the key factors fueling the rise of the home office is the increasing availability of remote work opportunities. As companies recognise the benefits of a flexible work environment and the positive impact it can have on productivity and work-life balance, the concept of the traditional office is evolving. No longer confined to a physical location, employees now have the freedom to work from anywhere, and many are choosing to work from the comfort of their own homes.
The transformation of the home office has also been driven by advancements in technology. High-speed internet connections, sophisticated digital tools, and video platforms have made it easier than ever to communicate and collaborate remotely. This accessibility has made the need for a dedicated workspace within the home even more essential. Which is why designing a functional home office that caters to the specific needs of remote work has become a priority for many homeowners.
When creating a home office, it is crucial to strike a balance between functionality, comfort, and style. Ergonomics plays a vital role as individuals spend long hours seated at their desks. Adjustable chairs, standing desks, and proper lighting are essential elements that contribute to a healthy and productive work environment. Incorporating natural light into the design can uplift the mood and create a calming atmosphere, reducing stress and enhancing creativity.
To maximise productivity and minimise distractions, it is important for a home office to be a separate and dedicated space within the house, where possible and where not possible this can be achieved through thoughtful interior design choices such as using room dividers or transforming an underutilaized room into a productivity hub. By creating physical boundaries, individuals are able to mentally transition into work mode and establish a clear separation between their personal and professional lives.
Furthermore, incorporating personalized elements into the home office design can enhance motivation and inspiration. Artwork, plants, and personal mementos can add a touch of personality to the space, making it feel more inviting and stimulating. Purposeful storage solutions, such as built-in shelves or storage are also key elements.
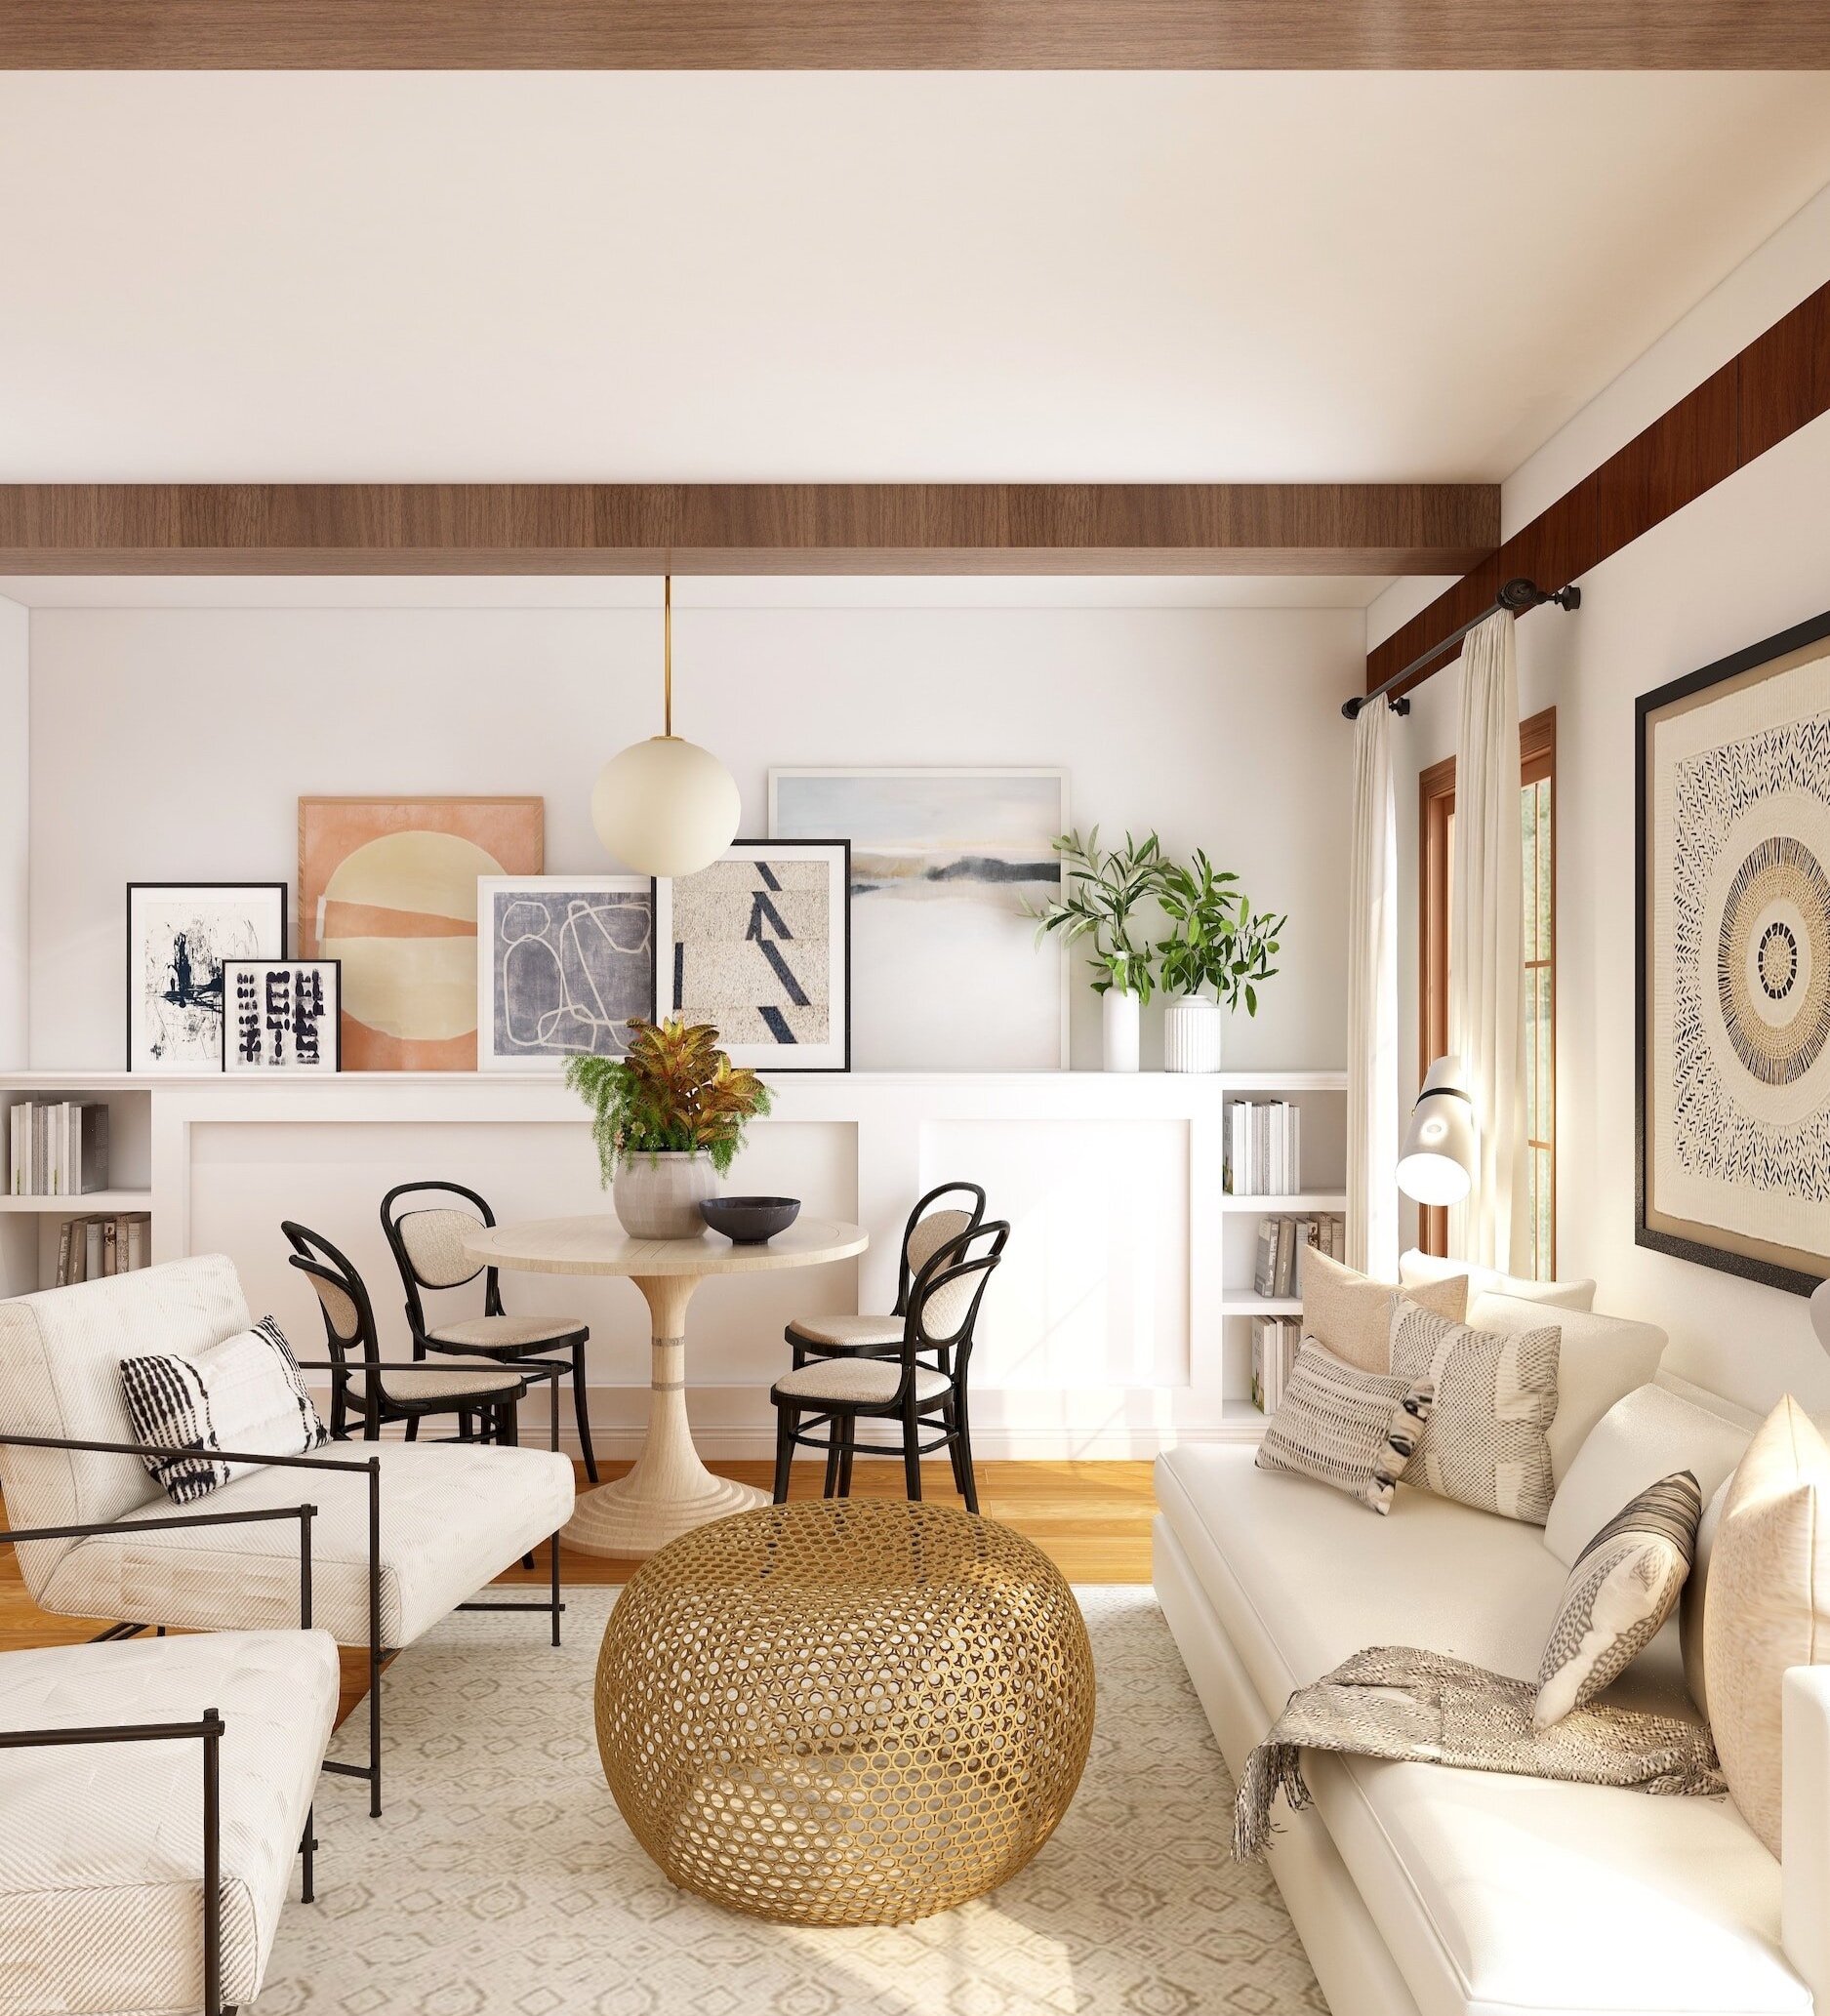
Creating Dynamic Adaptable Living
Creating dynamic and adaptable living spaces to meet the diverse and complex needs of modern living, is becoming more and more important to consider when designing.
Creating dynamic and adaptable living spaces to meet the diverse and complex needs of modern living, is becoming more and more important to consider when designing.
There are many factors for this trend in multi-purpose spaces, one major one is the sheer fact that properties are getting smaller and particularly in urban settings space is at a premium resulting in more people living in tiny studio flats and the like.
I am fascinated by ways to adapt space and have always designed in a manner that puts spatial planning front and centre in ensuring space is used effectively to meet all the clients needs in the most effortless way.
This is why at LitterArty, we believe in creating interiors that not only exude character and style but also prioritise functionality and adaptability. Our mission is therefore to design living spaces that can effortlessly evolve with the changing needs of our clients. Welcome to a world where dynamic adaptability reigns supreme.
In the realm of dynamic adaptable living, every aspect of a space is carefully crafted to enhance its flexibility. Gone are the days of standardisation and rigid floor plans. Instead, we embrace the beauty of versatility, enabling homeowners to effortlessly transform their living areas to suit different occasions, moods, and lifestyles.
One of the key elements we consider when designing a dynamic adaptable living space is the layout. By utilizing open floor plans and multipurpose rooms, we create an environment where the boundaries between living, dining, and entertainment spaces become fluid. This allows for seamless transitions and encourages creativity in how the space is utilized.
Furniture plays a vital role in creating a dynamic living environment. We prioritize pieces that are not only aesthetically pleasing but also versatile in their functionality. Modular furniture, for example, allows homeowners to rearrange and reconfigure their seating arrangements as needed, catering to both intimate gatherings and larger social events. Additionally, incorporating furniture with hidden storage compartments ensures that every square inch of a room can be utilized efficiently.
Lighting is another crucial element in creating adaptability. By using a combination of ambient, task, and accent lighting, we provide homeowners with the ability to create different moods and atmospheres at a moment's notice. With the rise of smart lighting systems further enhance this adaptability, allowing residents to control the intensity and colour of lights through their devices.
Technology also plays a significant role in dynamic adaptable living. Integrating home systems enables homeowners to control various aspects of their space, such as temperature, security, and entertainment, from a centralized hub or their smartphones. This seamless connectivity adds a layer of convenience and adaptability to everyday living.
Lastly, we understand that true adaptability extends beyond the physical aspects of a living space. It encompasses the ability to accommodate changing needs and lifestyles. Our design philosophy revolves around creating spaces that are not only beautiful but also functional for all life stages. From incorporating accessible features for individuals with disabilities to designing spaces that can be easily modified to accommodate growing families, we strive to future-proof our designs.
At LitterArty, we truly believe that dynamic adaptable living is the future. By combining thoughtful design, versatile furniture, smart technology, and a focus on evolving needs

HowTo - Spatial Plan
Our quick and handy Howto guide on spatial plan, helping you to make the most of your room and guide you with furnishing. Part of LitterArty x HowtoHome’s handy HowTo series.

It can be daunting sometimes working out how and where to fit and position furniture in any given space. While there is some level of subjectivity based on personal comfort and requirements, there are a few handy rules to help you establish suitability of furniture and not end up in a situation where things don’t fit or the space isn’t accessible.
How to ensure you have enough free space?
A general rule of thumb is to allow approximately 50cm (minimum) of space from one piece of furniture to the next. There are of course exceptions to this rule such as the distance between a console table and the back of the sofa or next to a bed. In cases where your aim is to have one support the other and be in close contact then obviously this rule does not apply.
In hallways and passing places it’s advisable to up this minimum and allow at least 80-90cm of space so that the area doesn’t feel cramped and walking past objects and items of furniture is a challenge.
Top Tips:
- Consider where fixed obstacles positioned, such as doors, windows, radiators and fireplaces. You need to allow space around and plan furnishings that will fit around these features and balance out the space.
- Think about volume and don’t over fill a space.
- Ergonomics - ensure that there is a circulation passageway through a room. This follows an easy pathway from the door to all the other main areas of activity.
- Edit your clutter, clutter brings in spaces and creates a sense of chaos. By minimising clutter you optimise your space, yes it’s common sense.
Questions to ask:
1) What, is the space used for, what are its functions?
2) Who, uses it? How many people does it need to accommodate etc.
3) How, do you want the room to feel? Spacious, airy, cosy, minimal….
4) Are there focal points? Or do you need to create focal points?
Another question we are regularly asked is; What is the optimal distance between a TV and your seating? Again, a general rule of thumb is to base this on the size of your TV, take that measurement and times it by 1.5 to 2.5 to gauge your most comfortable viewing distance. So for example, a 37 inch TV could be positioned around 6 ft from your sofa for optimal spatial planning. Obviously, this is relative and subjective to personal comfort but it’s not a bad rule to stick by.

HowTo - Measure a Room
Our quick and handy Howto guide on measuring a space. Part of LitterArty x HowtoHome’s handy HowTo series.
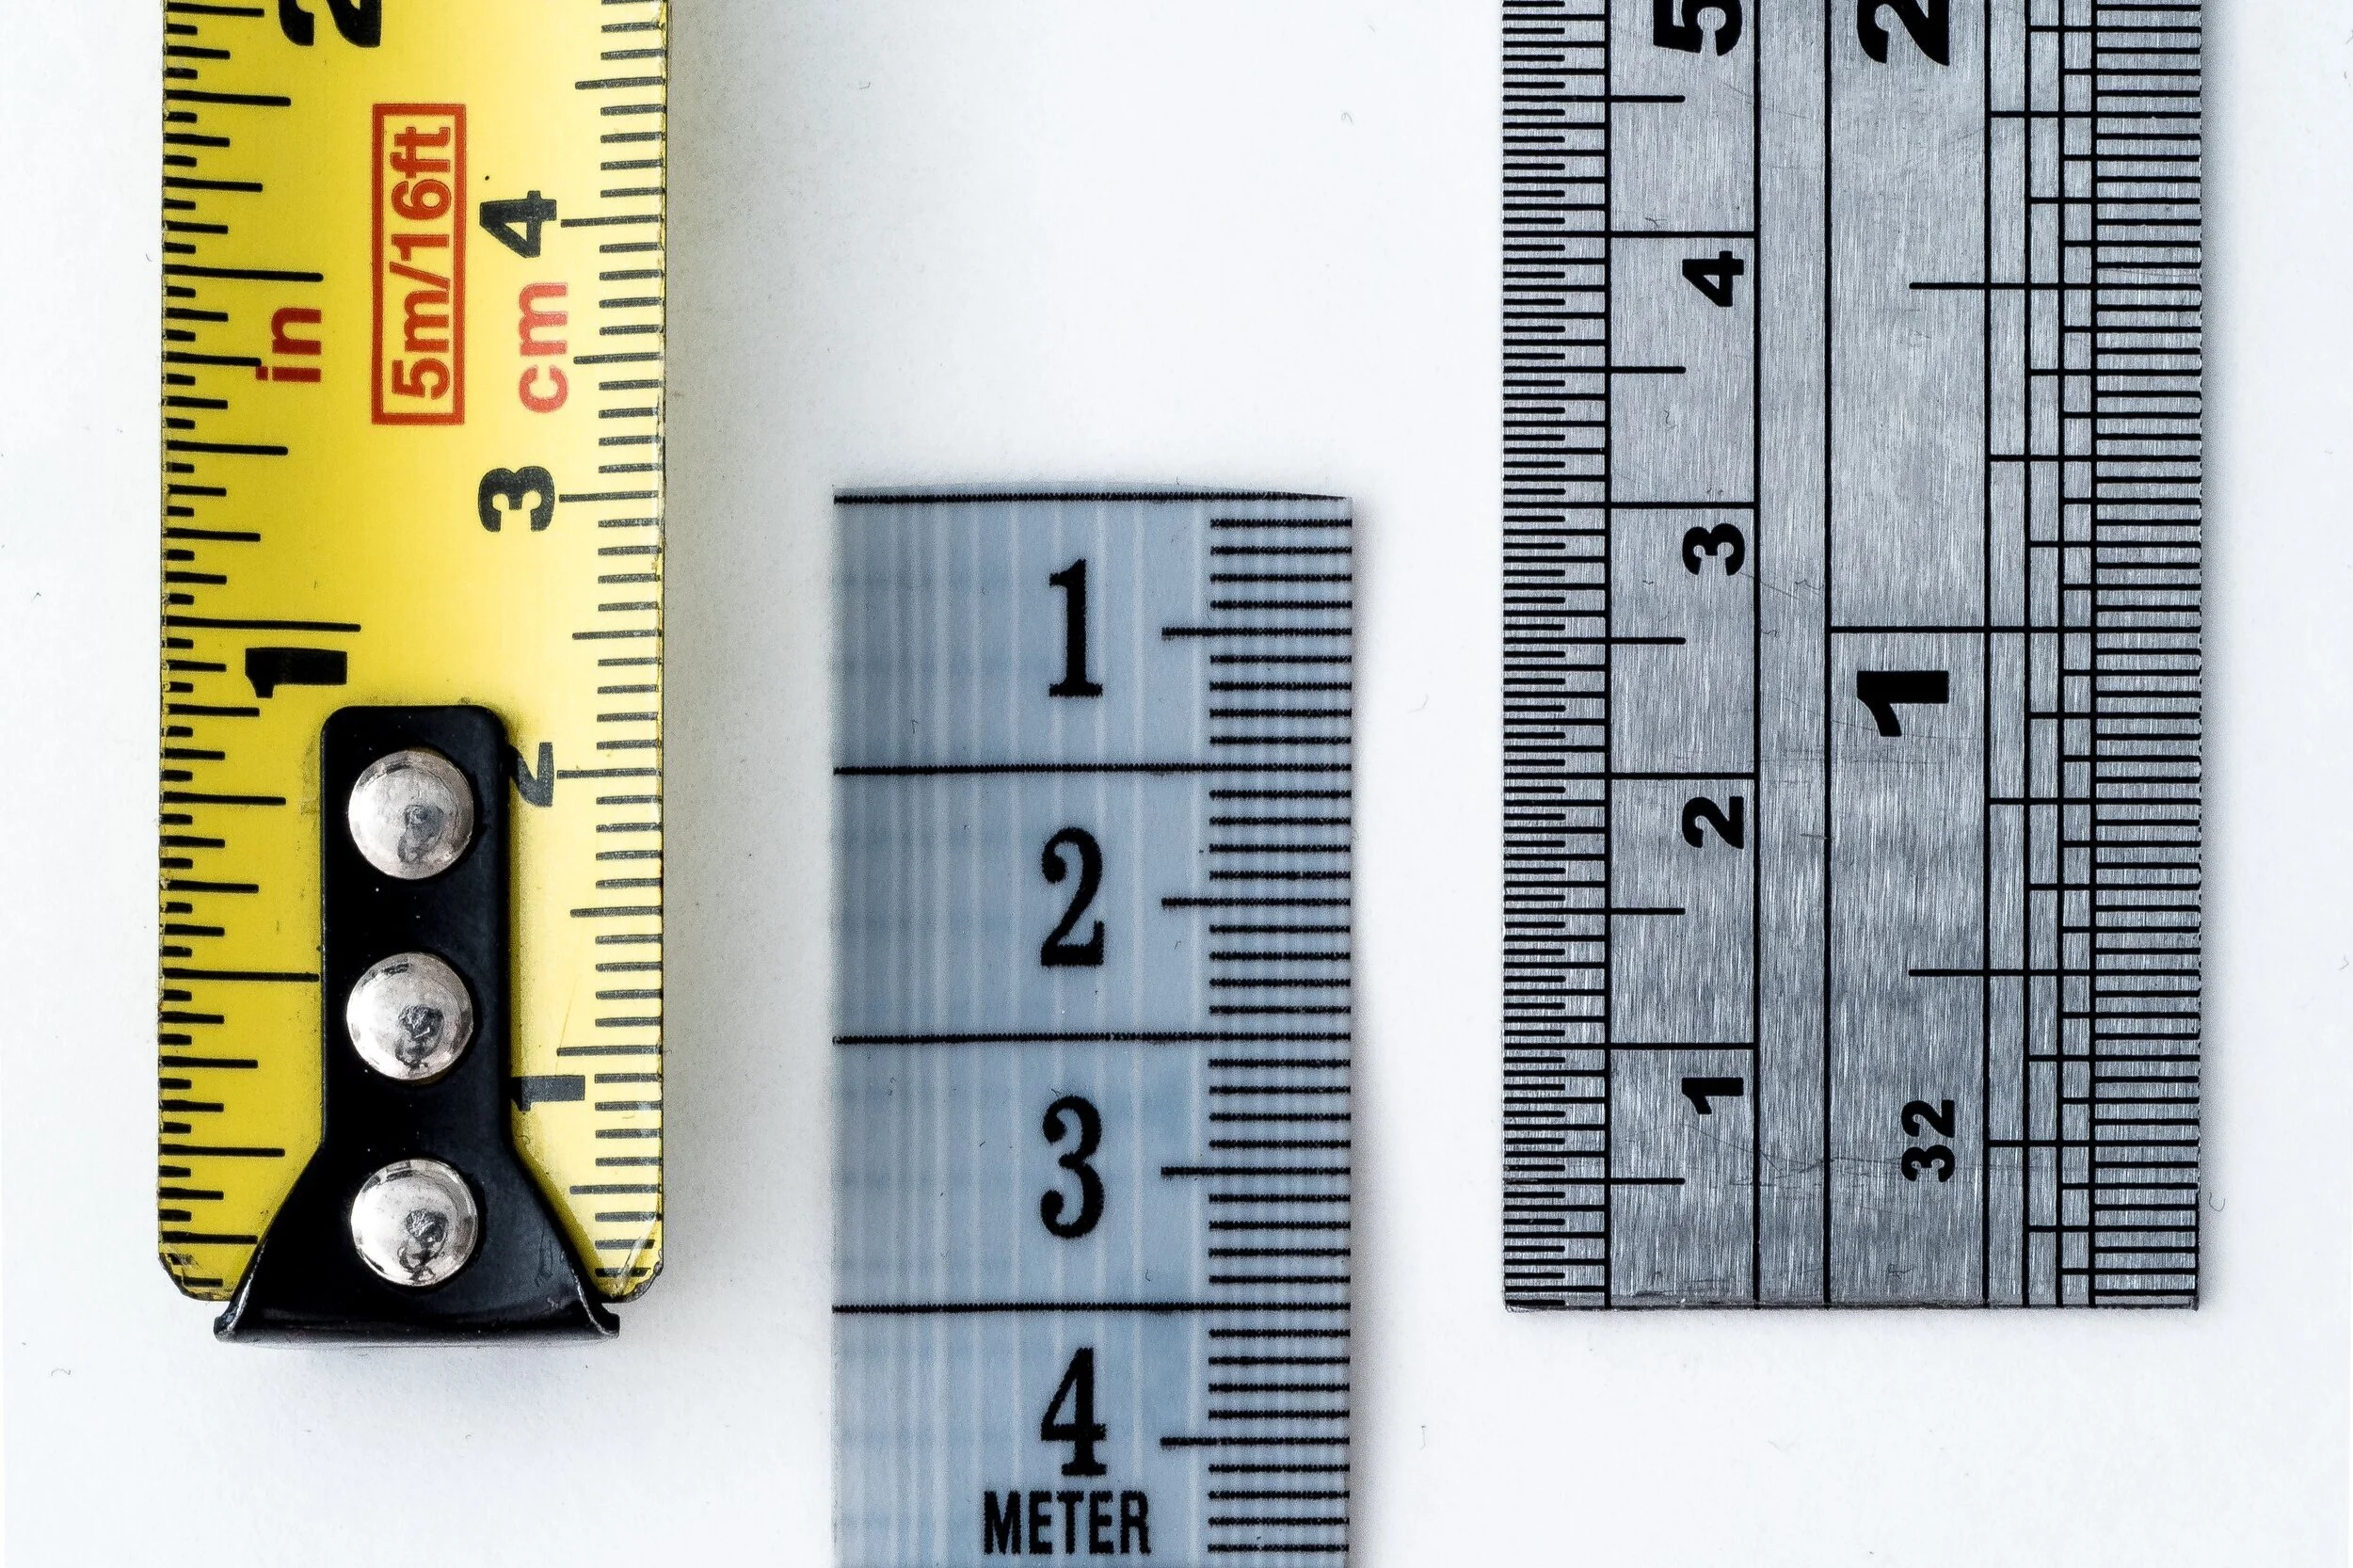
1. Make sure you have a sturdy and decent length tape measure. This simply makes life easier and means you can measure quickly.
2. Have a paper and pen to hand for notes and to quickly sketch out the outline of your room. All you need is the general shape, no need for accuracy as long as it makes sense to you.
3. Mark window and door locations.
4. Start by measuring the width at the longest point of the room, the same with the depth and then the height.
5. Then take at least the same measurements at around 5 points across the room. This helps with accuracy, as most rooms are nor 100% even. 6. Next measure all large elements such as alcoves and other nooks. Do this by following the same principle as above (width, depth and height). Note these measurements in the correct locations on your room outline.
7. Measure all the windows and doors. You want to know the width and height of the opening and then also the height of the window base from the floor. Again mark this on the outline.
8. Make notes of all utility and socket locations i.e. radiators, sockets, aerial points. To measure their exact location, measure from the nearest fixed point (i.e. edge of the wall in a corner) to the middle of the fixture. This is particularly useful for radiator location.
Tips
- When measuring the height of your room, make sure you allow for picture rail and cornice height. This is relevant for walls where you are wanting to feature wither freestanding or built in units such as shelving that require to sit within these parameters. Make notes where relevant.
- Doorway measurements are pivotal for planning furniture as well as the layout design, it’s all well and good picking great furniture but what if the space to get it in to the room is limited?! All these details help.
- Not location of any architectural features that are relevant or limit design decisions.
- Clear detail is key!

HowTo - Hang Pictures
Our quick and handy Howto guide on picture hanging. Part of LitterArty x HowtoHome’s handy HowTo series.
To get you started, here is a check list of tools and equipment you may need to hang pictures securely, safely and successfully.
- Tape Measure
- Pencil and Rubber
- Spirit Level
- Hammer
- Drill (if hanging heavy work that requires a wall plug and screw)
- Picture hooks and nails
- Wall plugs and screws (if required)
- Cord or wire for hanging.
Before you grab the hammer and start attempting to hang your picture, you need to make a few practical decisions, such as, where you want it hung and is the wall structure suitable. You also need to decide how much support you’ll need to hang your picture securely, whether single or multiple hooks etc. Once you’ve established the location and hanging equipment needed follow there are some basic steps to follow for hanging. Whether you are going for a relaxed or a traditional museum approach this is a great base point. All rooms are different and the museum approach may not be appropriate for your décor.
Step 1 – Measure
Take a width measurement of the wall you are hanging your chosen picture on.
Step 2 – Align with the centre of the wall
Find the centre point of the wall by halving the overall width and place a small pencil mark.
Step 3 – Determine the Height
Most people hang pictures too high; you should not have to strain your neck to see them. There is a bit of a science to picture hanging. That said, this is where your subjective style comes in, whether following the museum approach or not.
Relaxed approach
If you're confident with your artistic abilities, use your eye to judge where to hang your painting. This will allow you to balance your furniture, doors and windows. Just makes sure it's at a comfortable eye level. If not follow the next step:
Technical/Museum approach – a simple equation
1) Measure 145cm from the floor this is the ‘ideal’ middle point of your picture.
2) Measure your picture and half it, this is the centre point. This is A.
3) Measure the tension depth from the top edge – pull the picture cord/wire to full tension as it will be when hanging. This is B.
4) Find the height by doing this simple equation – 145 + A – B = Height to position your nail.
Handy tips
- A lot of plastered walls, particularly in older properties can crumble when a nail is hammered in. To protect your surface from damage or marks place a small piece of masking tape over the point for hanging. This will help to protect the nail point from causing damage.
- If your frame is heavy or slightly rough on the reverse place some small sticky felt pads on the reverse bottom two corners just away from the edge. This will pad and protect from rubbing or movement works on the wall.
- Use a spirit level to double check how level your picture is by placing it on the top and then the bottom of the frame, adjust accordingly.
- 5-7cm between frames is a great rule to apply.
Hanging a Picture Wall or Cluster
Follow the same three steps, measure, find the middle width and determine height, then add the following step:
Additional Step 1 – Line up the centre, making the centre of the cluster/picture wall sit along the 145cm centralised mark.
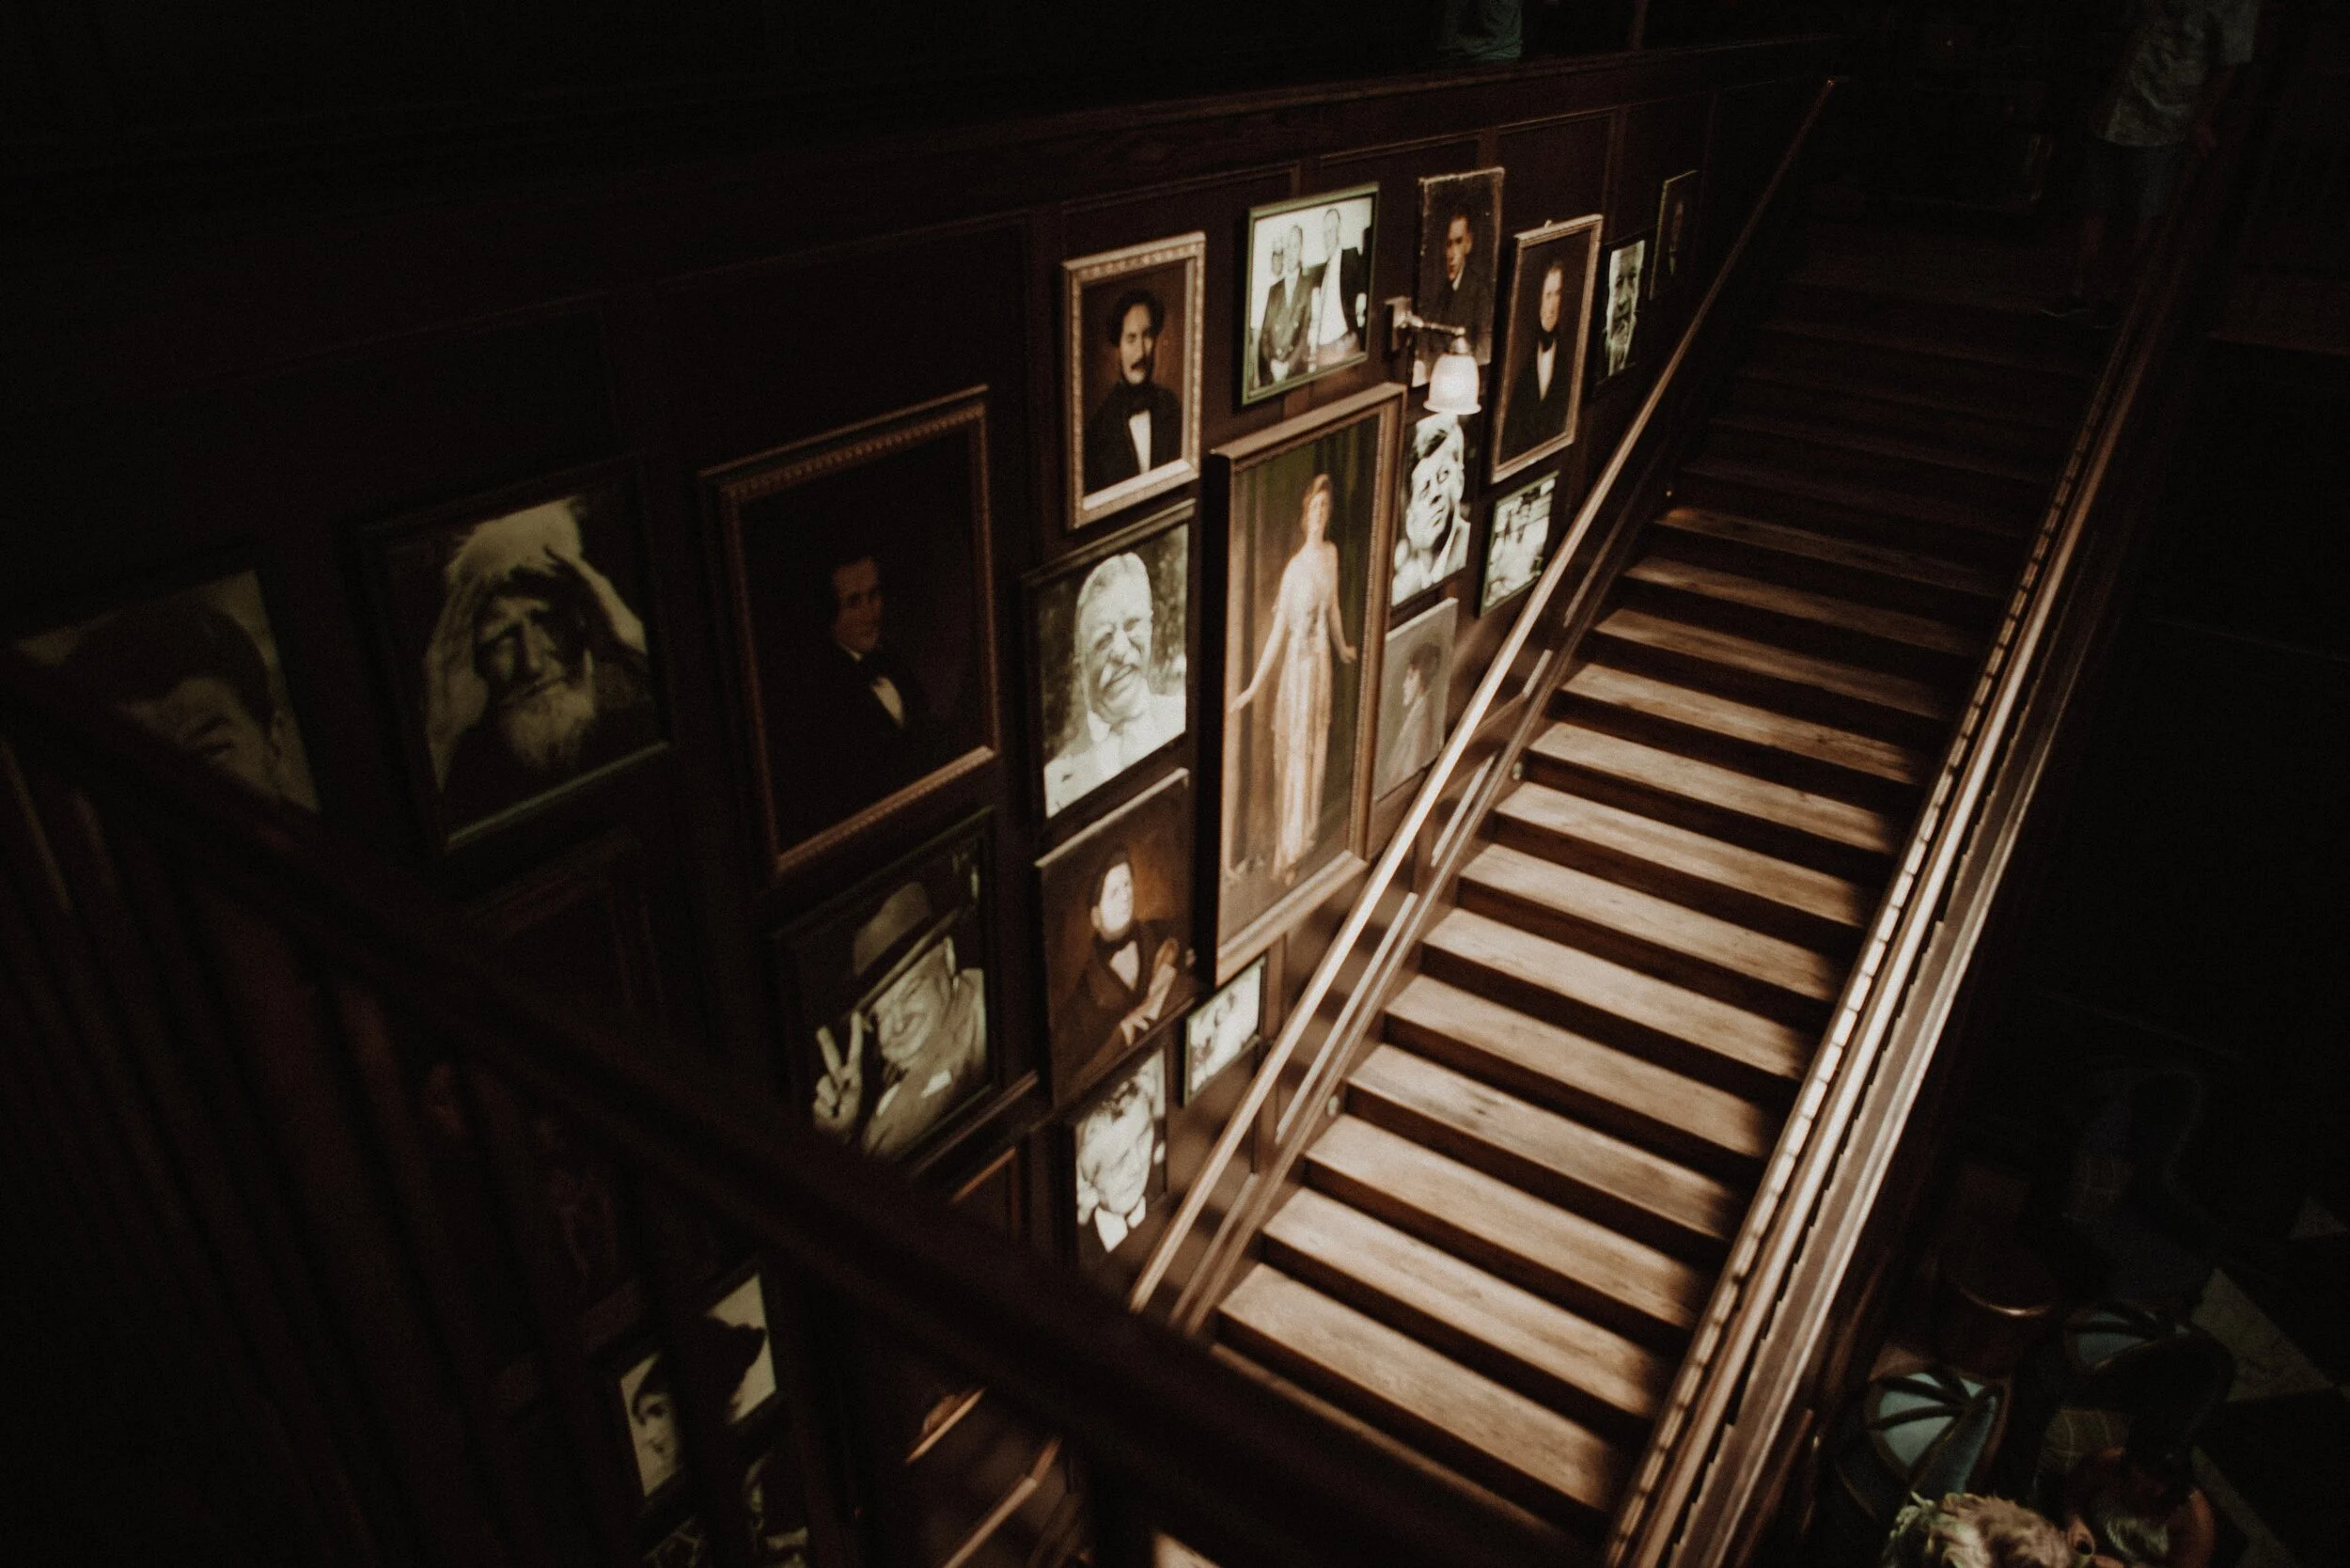
Hanging Pictures on the Stairs
Dependant on your desired overall look, you can plan this intuitively or structured. If going down the structured route add the following step:
Additional Step 1 – measure 145cm from the floor, this should be the centre of your first picture.
Additional Step 2 – measure 145cm from every second to third step to form a diagonal line. This line should be the centre of each picture and then use the size of your frames to position each picture at an equal distance to space out most effectively.
Hanging a Scattered Display
Choose a piece as a central focal point. This will form the middle of your cluster. Then follow these steps:
Step 1 – Measure up your 145cm point to find the middle point of your central picture.
Step 2 – Build your gallery from the middle out, making sure you balance your pictures as you go. Always ensuring the central line stays at 145cm.
This process is very subjective to what you see as ‘balanced’ so go with what suits you and suits the pictures and artwork you love and are wanting to hang.